How to Manage Bookmarks in Google Chrome (2025 Update)
In this tutorial, we will show you exactly how to manage bookmarks in Google Chrome in just a few simple steps. Read on to learn more.
Manage Bookmarks in Google Chrome
Follow the steps below to manage bookmarks from Google Chrome.
1. Access the Bookmarks Menu
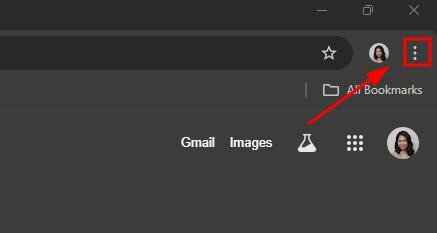
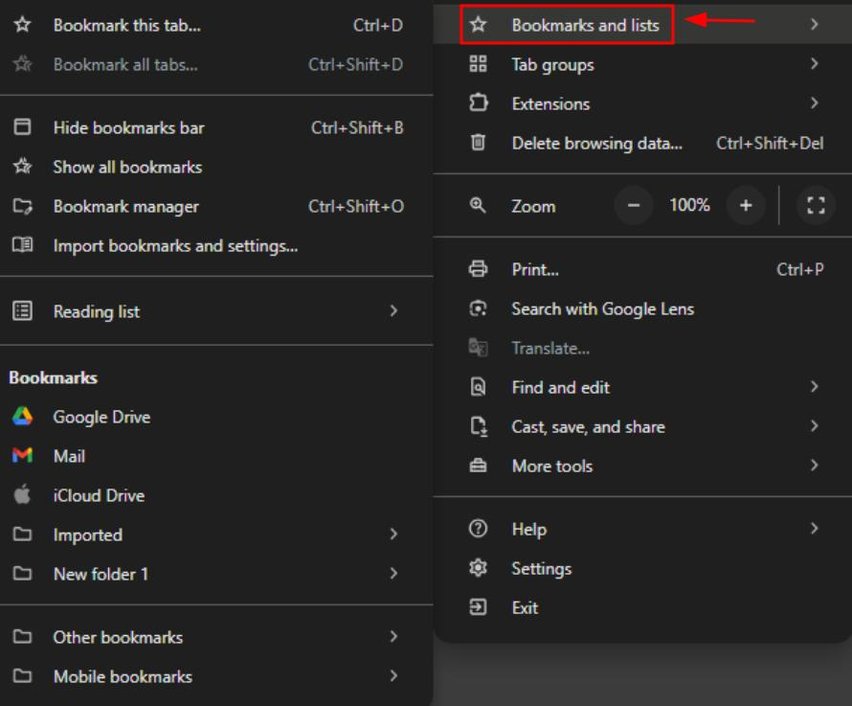
Click on the three-dot menu in the top-right corner of Chrome.
Hover over “Bookmarks and lists” to open the bookmarks options. From here, you can view, add, or manage your bookmarks.
2. Bookmark a Webpage Using the Star Icon
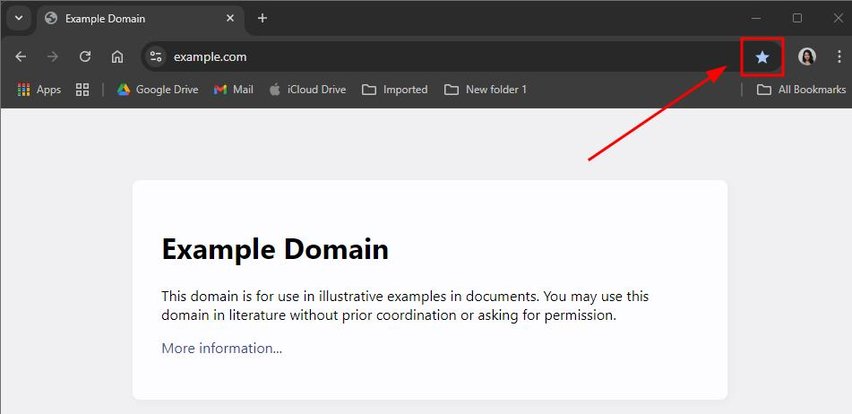
To bookmark the current page, click the star icon on the right side of the address bar.
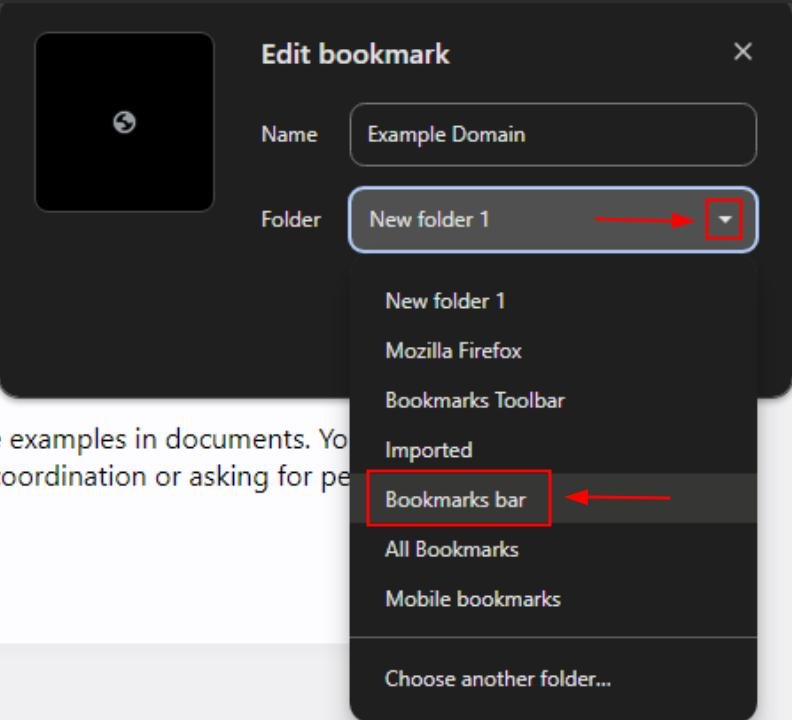
Choose a folder or select “Bookmarks bar” from the dropdown arrow for easy access.
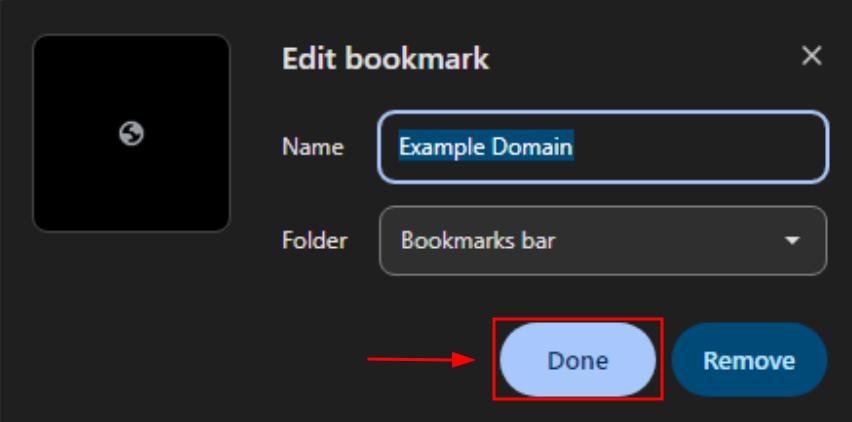
Click “Done” to save the bookmark.
3. Create a Folder for Bookmark Organization
Click on the three-dot menu, then select “Bookmarks and lists” and “Bookmark Manager.”
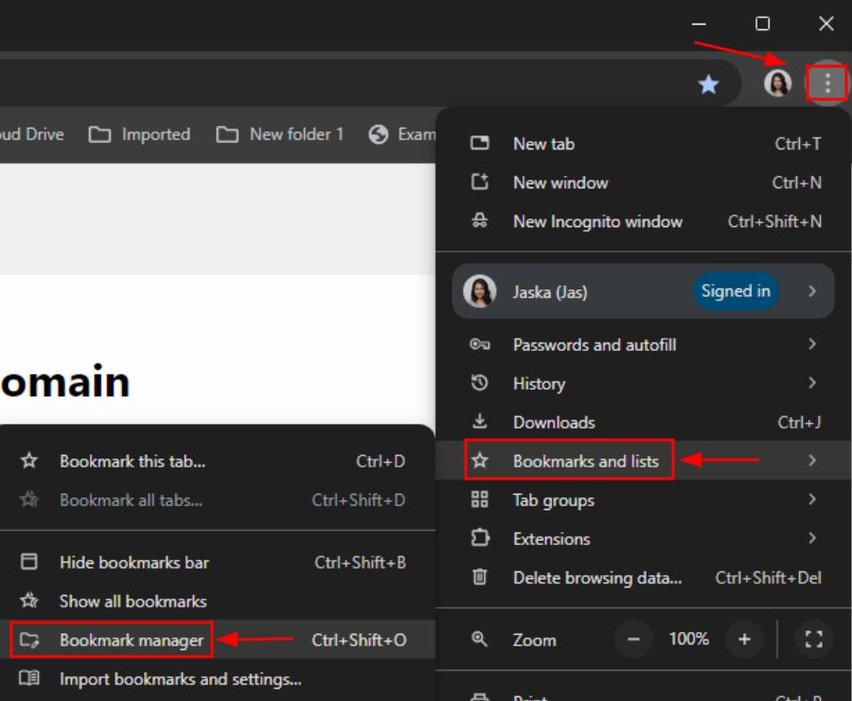
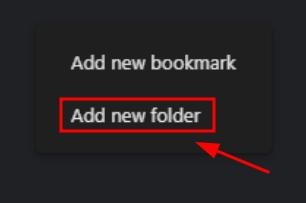
In Bookmark Manager, right-click on a space, then click “Add Folder.”
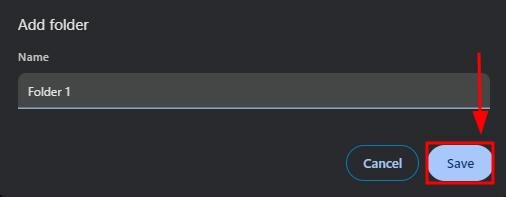
Type a name for the folder, for instance “Folder 1” and press Enter.
4. Edit or Rename an Existing Bookmark
Right-click on the bookmark in the Bookmarks Bar or Bookmark Manager. Select “Edit.”
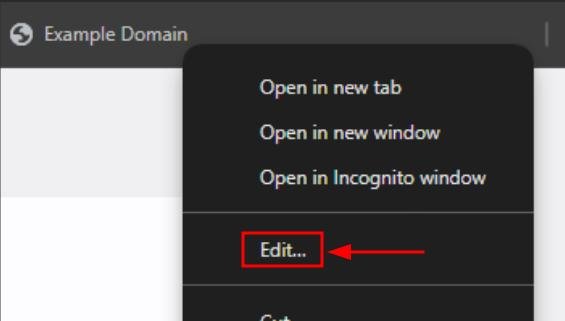
And then type in the new name or select a different folder (e.g. Other bookmarks, Mobile bookmarks etc.)
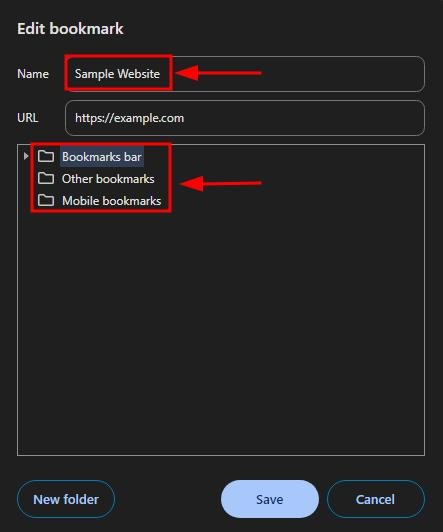
Click “Save” to apply the changes.

5. Delete an Unwanted Bookmark
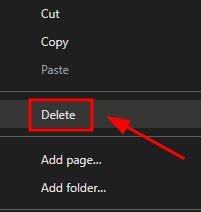
Right-click on the bookmark you want to delete, whether it’s in the Bookmarks Bar or Bookmark Manager. Select “Delete” from the dropdown menu. This will immediately remove the bookmark.
6. Export or Import Bookmarks For Backup
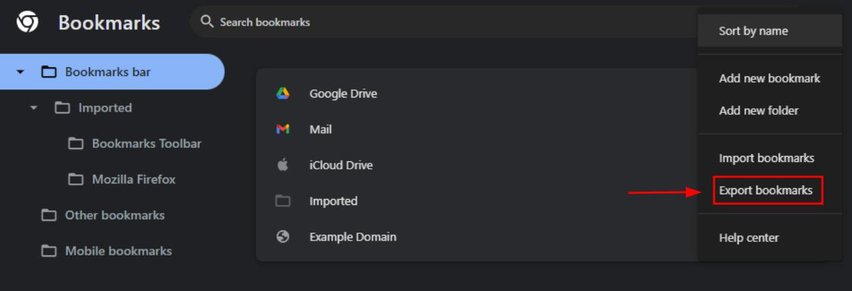
Open the Bookmark Manager, then click on the three-dot menu in the top-right corner of the manager window. Select “Export bookmarks” to save them as an HTML file.
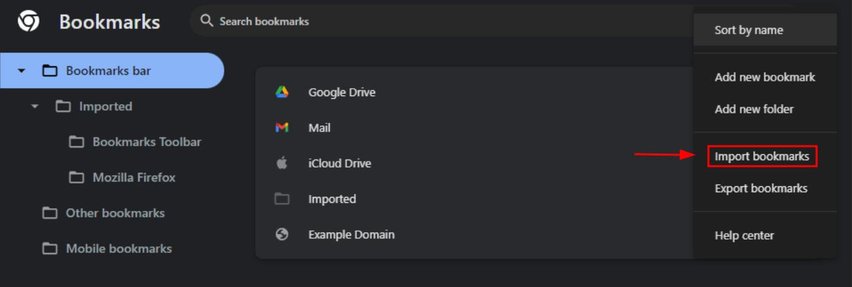
To restore, use “Import bookmarks” and choose the saved file.
7. Show or Hide The Bookmarks Bar
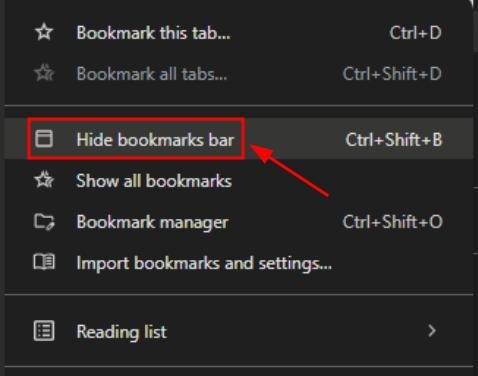
Click the three-dot menu, go to “Bookmarks and lists,” then select “Show bookmarks bar” to toggle it on.
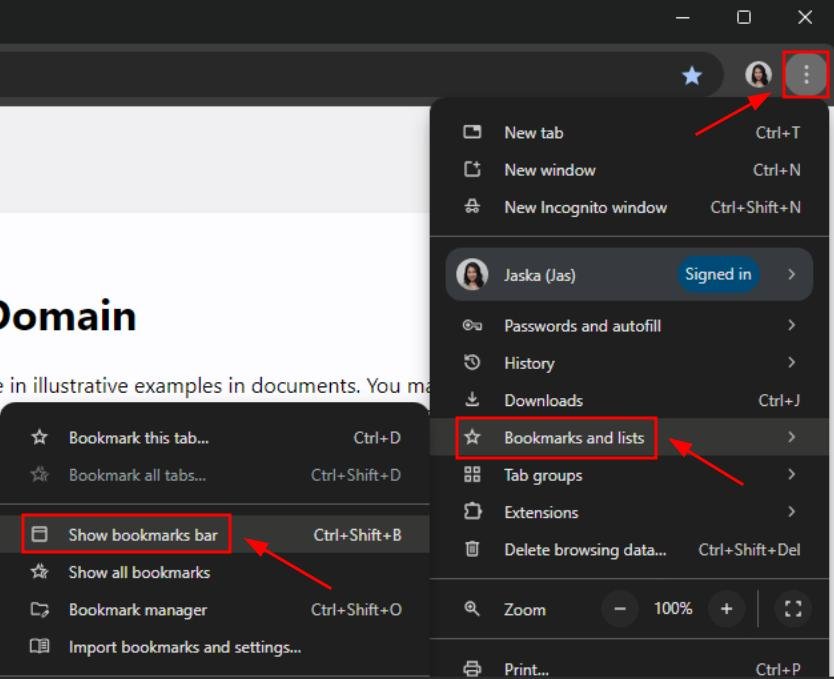
If the option is “Hide bookmarks bar”, the bar will be hidden from under the address bar.
8. Sync Bookmarks Across Multiple Devices
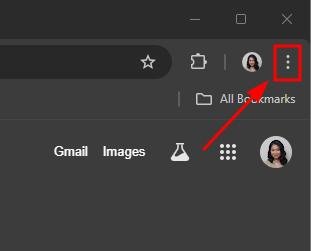
Click the three-dot menu.
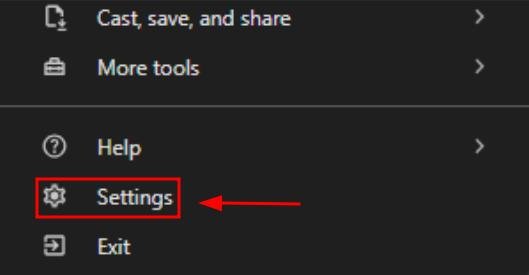
Then select “Settings.”
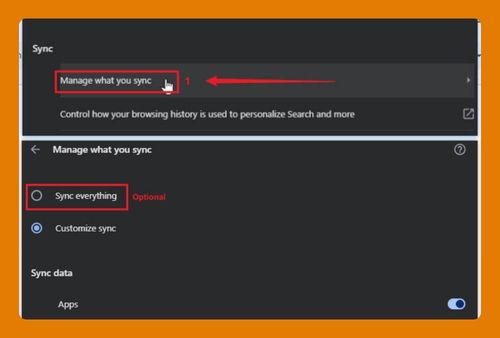
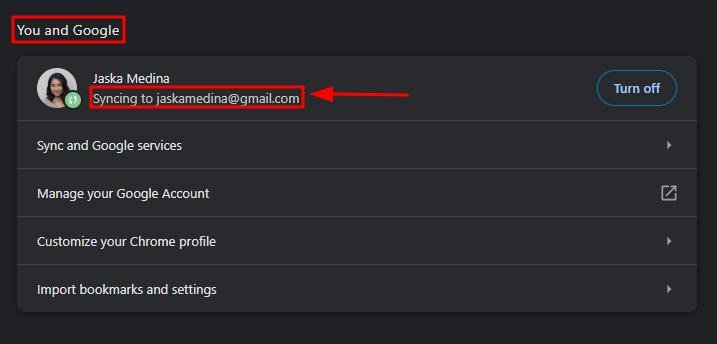
Under “You and Google,” make sure you’re signed into your Google account and syncing is turned on. “Syncing to [your email]” means that your bookmarks sync across all devices connected to this account.
We hope that you now have a better understanding of how to manage Chrome bookmarks. If you enjoyed this article, you might want to check our articles on how to fix Google Chrome not syncing bookmarks and how to find Chrome bookmarks that disappeared after update.

