Google Chrome Registry Settings (The Ultimate Guide for 2025)
In this article, we will show you how to clear Chrome registry settings. Simply follow the steps below.

How to Clear Google Chrome Registry Settings
To clear Google Chrome’s registry settings, follow the process below.
1. Open the Registry Editor
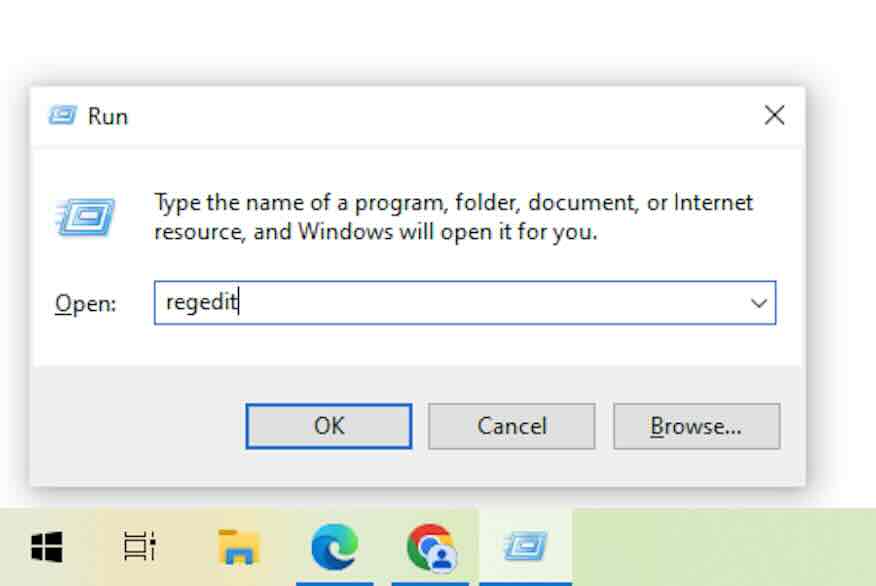
To clear Chrome’s registry settings, access the Registry Editor. Press Windows key + R to open the Run dialog box. Type regedit and press Enter.
Make sure you’re logged in as an administrator to access the Registry Editor.
2. Check Permissions for the Chrome Registry Folder
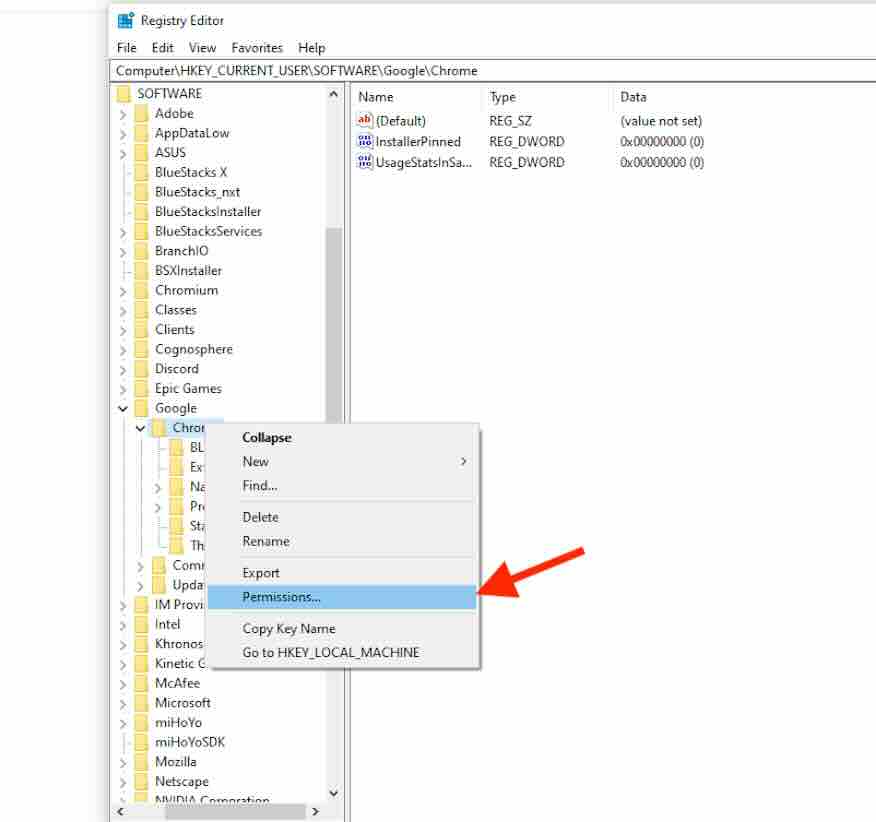
Once in the Registry Editor, you need to check if you have permission to delete the Chrome registry folder. Navigate to HKEY_CURRENT_USER > Software > Google > Chrome.
Right-click the Chrome folder and select Permissions. Ensure your user account has Full Control. If it doesn’t, click Add, enter your user account, and grant Full Control.
3. Backup Your Registry Settings
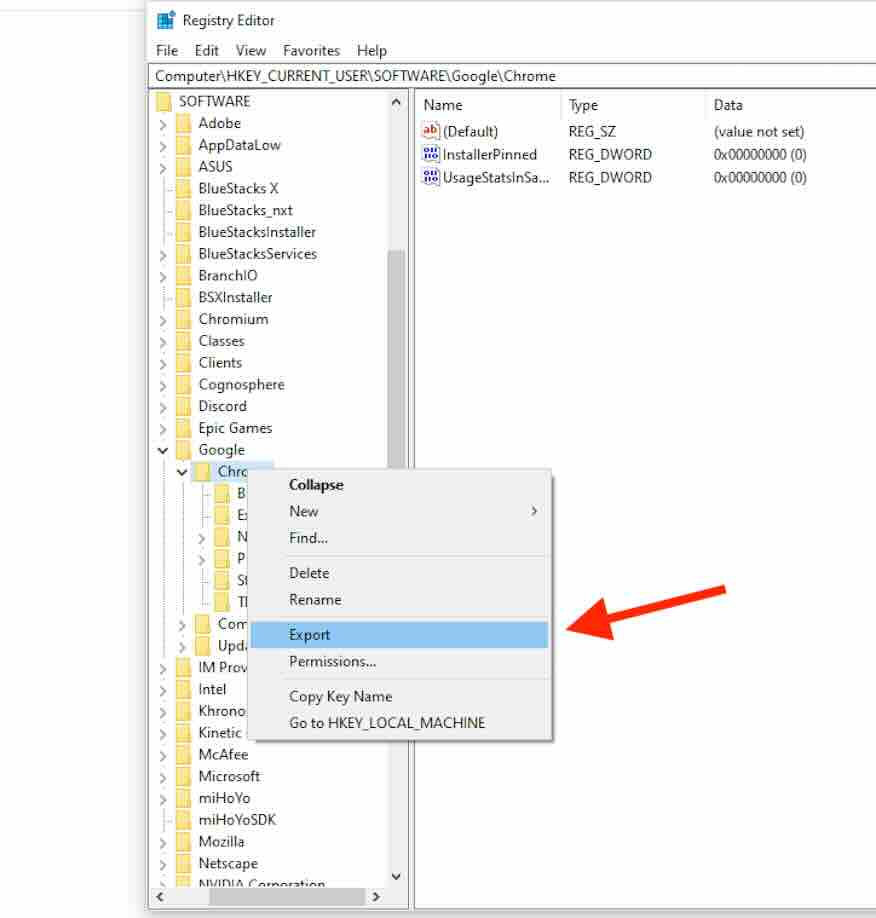
Before making any changes, it’s a good idea to back up your settings. Right-click the Chrome folder and select Export. Save the backup file in a safe location so you can restore it if needed.
4. Delete the Chrome Registry Folder
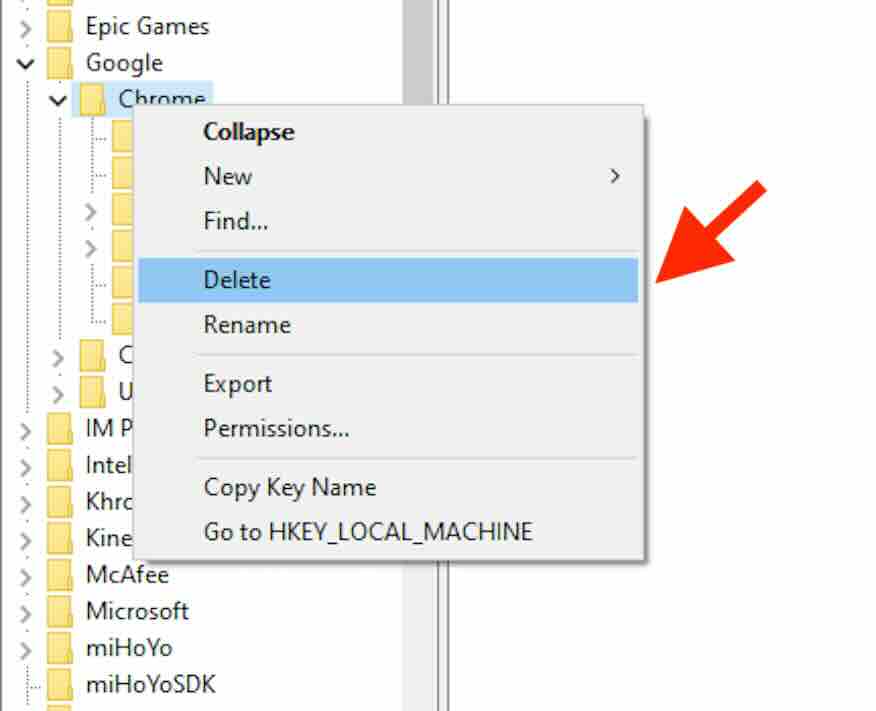
Now, you can proceed to delete the folder. Right-click the Chrome folder and select Delete. Confirm the deletion when prompted. This will remove all Chrome settings from the registry.
5. Restart Your Computer
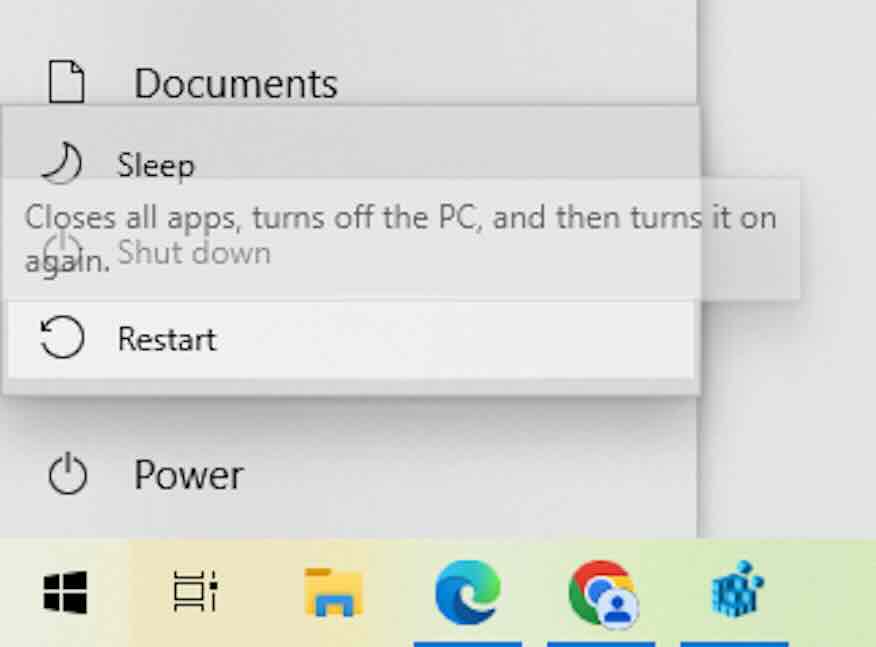
To apply the changes, restart your computer. Once rebooted, open Chrome to confirm the settings have been cleared.
We hope you now have a better understanding of how to delete Google Chrome’s registry settings. If you enjoyed this article, you might also like our articles on how to manage the camera settings in Google Chrome and how to adjust the language settings in Chrome.

