Google Chrome Microphone Settings (The Ultimate Guide for 2025)
In this article, we will show you how to control microphone settings in Chrome. Simply follow the steps below.
Control Microphone Settings in Chrome
To enable your Google Chrome microphone settings, follow the process below.
1. Open Chrome Settings
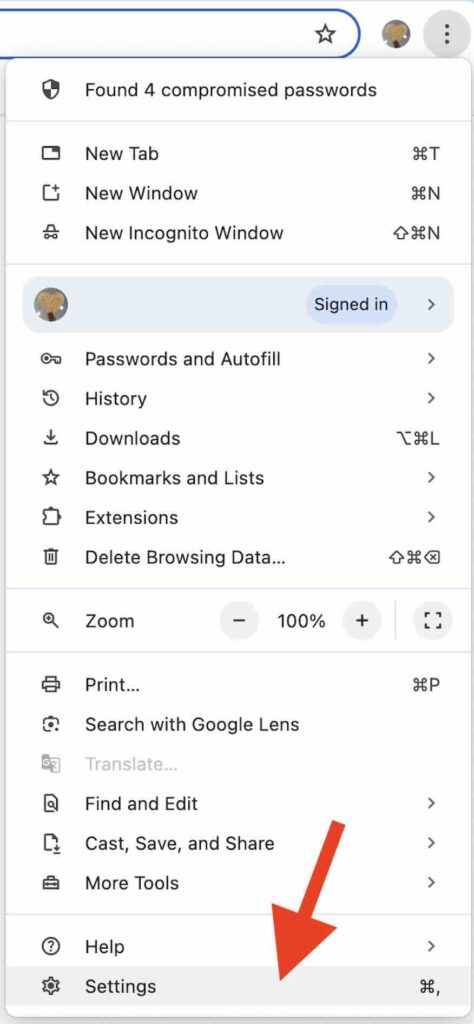
In Chrome, click the three dots in the upper-right corner of the browser window to open the menu. From the dropdown, click on “Settings.” This will take you to Chrome’s main settings page, where you can adjust various browser preferences.
2. Access Privacy and Security Settings
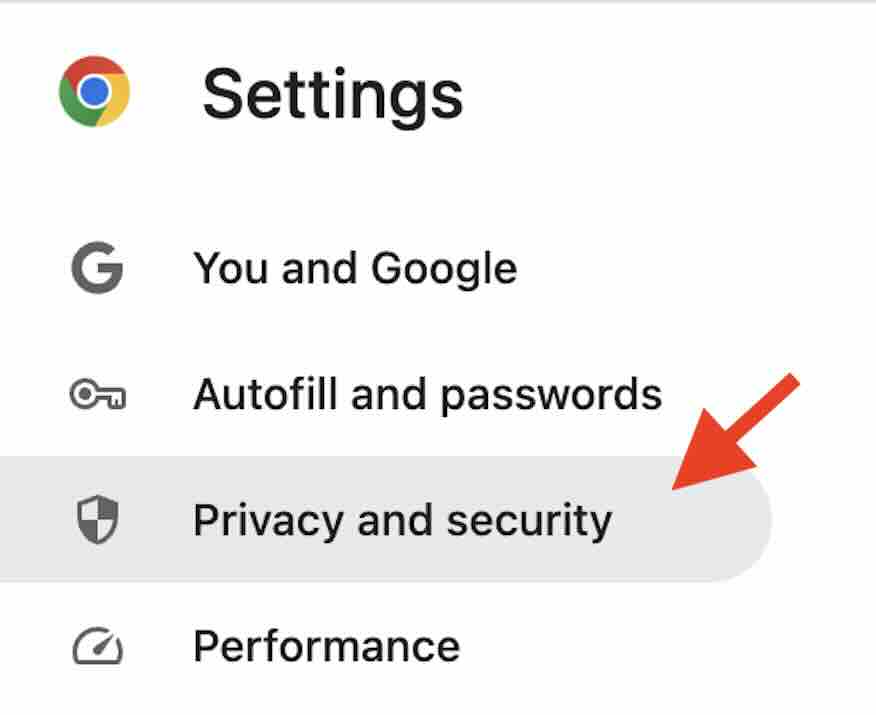
On the left side of the settings page, click on “Privacy and Security.” This section allows you to manage permissions related to your browsing activity, including microphone access.
3. Open Site Settings for Microphone Permissions
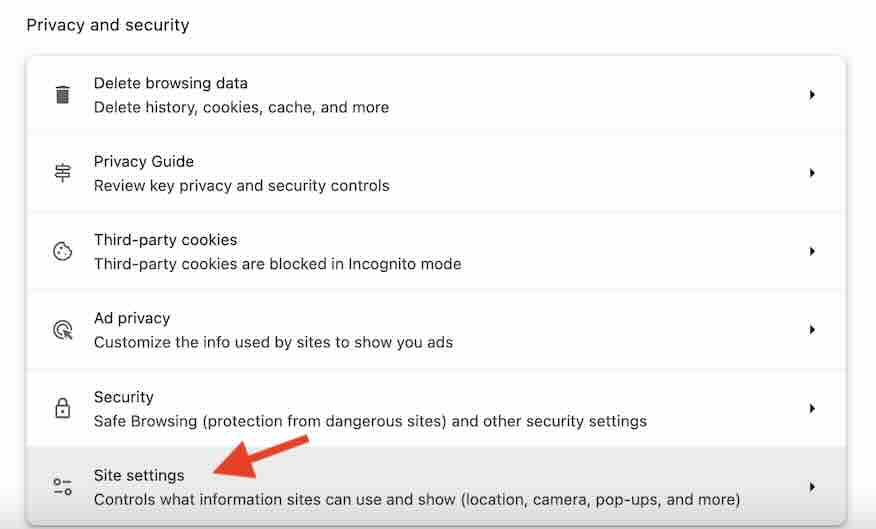
Under “Privacy and Security,” click on “Site Settings.”
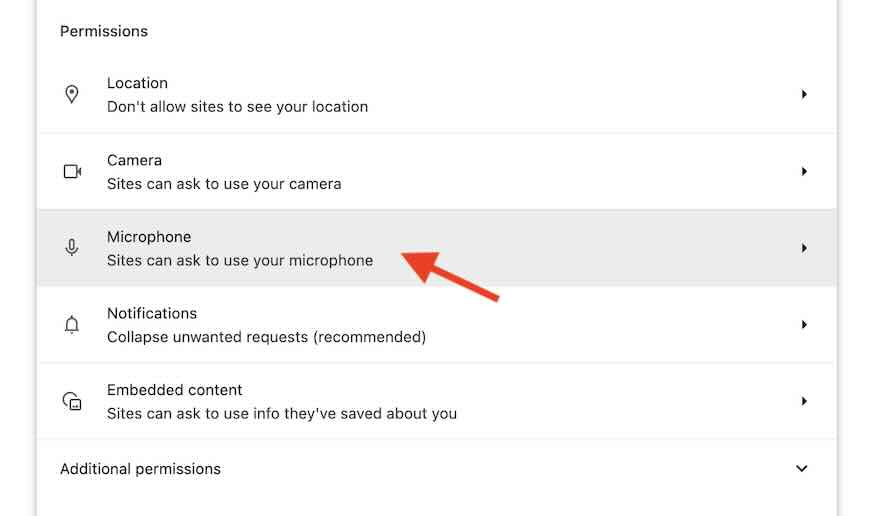
4. Select ‘Microphone’ Under the Permissions section
Scroll down until you find the “Permissions” section. Here, you’ll see options for controlling how websites interact with your device, including microphone access.
In the “Permissions” section, find and click on “Microphone.” You will see a list of all sites currently allowed or blocked from accessing your microphone.
5. Enable Microphone Access for All Sites
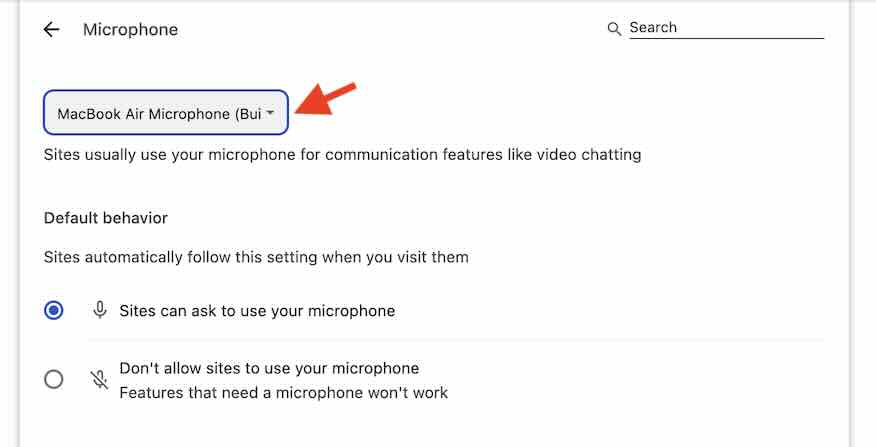
Change the default behavior to “Sites can ask to use your microphone,” or manually allow specific websites by selecting them from the list.
After enabling microphone access, you can select the microphone you want to use from the dropdown menu. This is important if you have multiple devices connected, such as a headset or external microphone.
We hope you now have a better understanding of how to toggle Chrome’s microphone settings. If you enjoyed this article, you might also like our articles on how to backup Chrome settings and how to manage sound settings in Chrome.


