Google Chrome Flashing Black Screen (How to Fix It in 2025)
In this tutorial, we will show you exactly how to fix Google Chrome flashing black screen in just a few simple steps. Read on to learn more.

Flashing Black Screen on Google Chrome
Fixing flashing black screens in Google Chrome can be achieved by using two effective methods: the ‘Adjust System and OpenGL Settings’ technique and ‘Clear Browser Cache’. We will discuss how to use each method in the following sections.
Method 1: Adjust System and OpenGL Settings
Follow the steps below to resolve Google Chrome black screen flashing issues by managing system and open GL settings.
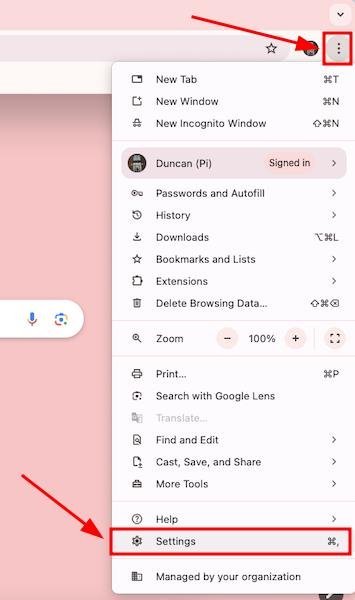
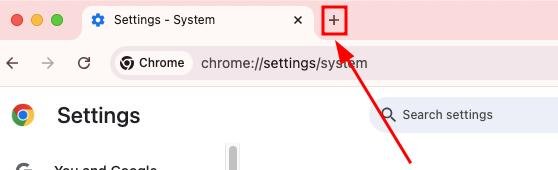
1. Open Chrome Settings
Click on the three vertical dots in the upper right corner of Google Chrome, and select ‘Settings’ from the dropdown menu to open the settings page.
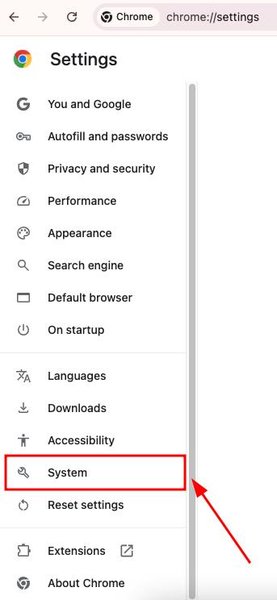
2. Click to System
In the settings menu, scroll down and simply click ‘System’ to access the relevant settings directly.
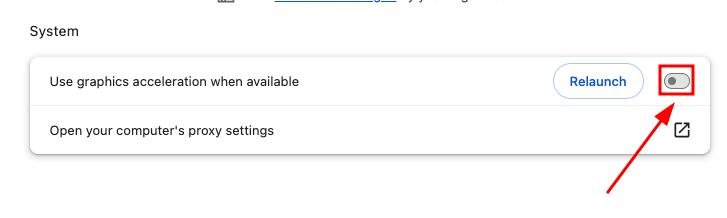
3. Disable Graphics Acceleration
In the ‘System’ settings, toggle off ‘Use graphics acceleration when available’ to improve browser stability and performance.
4. Open a New Chrome Tab
Initiate a new tab in Google Chrome to prepare for accessing advanced settings.
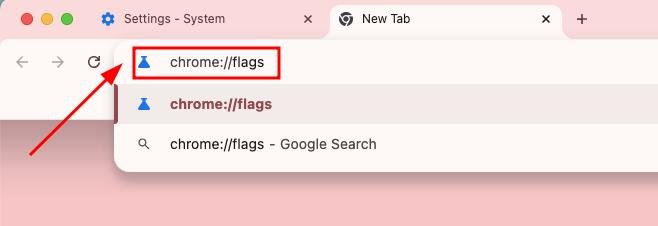
5. Enter Chrome Flags Settings
Type chrome://flags into the address bar of the new tab to access hidden Chrome settings known as Flags.
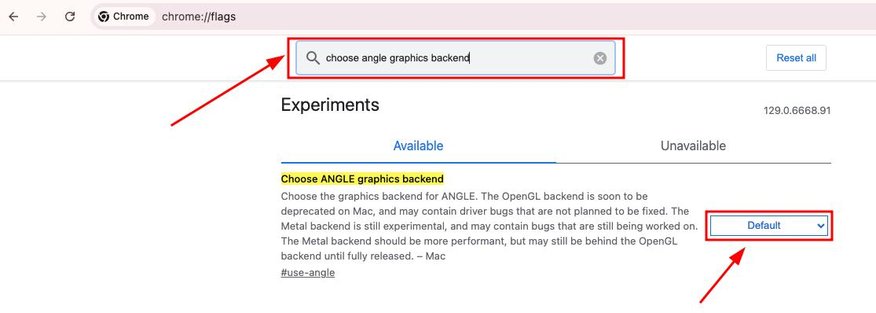
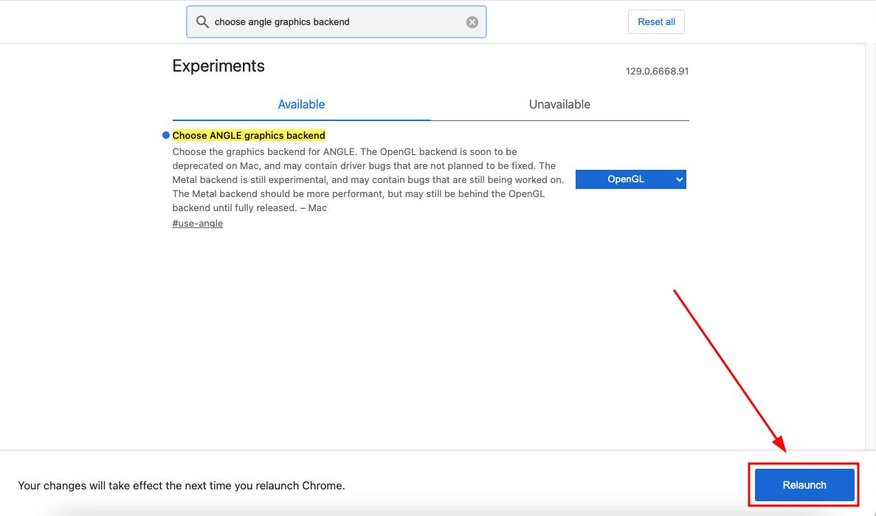
6. Search for ‘Choose ANGLE Graphics Backend’
In the Flags page, locate and click the ‘Default’ dropdown for ‘Choose ANGLE graphics backend’.
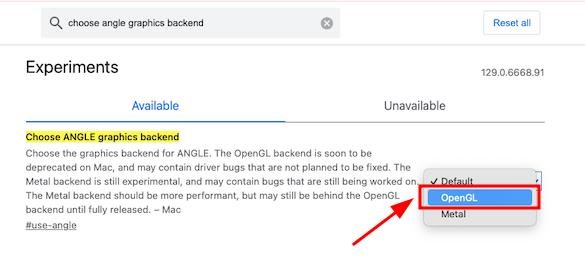
7. Select OpenGL
Choose ‘OpenGL’ from the dropdown options to optimize graphics processing.
8. Click Relaunch
Press the ‘Relaunch’ button to restart Chrome and apply the new settings.
Method 2: Clear Browser Cache
Here’s how to clear the cache in Google Chrome to fix the black screen flashing on Google Chrome.
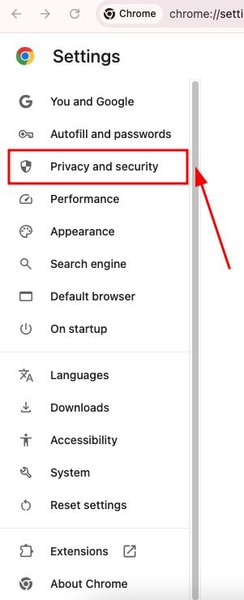
1. Access Settings from Chrome Menu
Click the three vertical dots in the upper right corner of Google Chrome, and select ‘Settings’ to open the settings menu.

2. Open Privacy and Security Settings
Select ‘Privacy and security’ from the settings menu to access options related to data privacy.
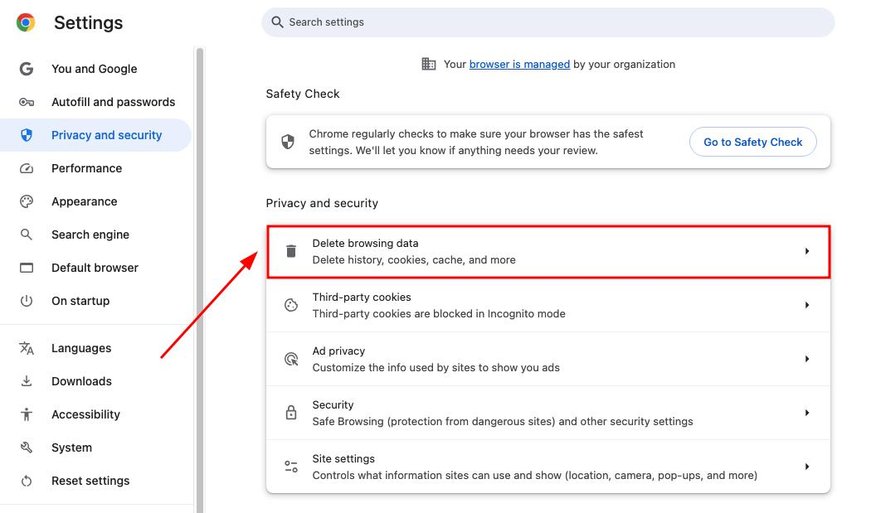
3. Click Delete Browsing Data
Under ‘Privacy and security’, select ‘Delete browsing data’ to open the data deletion window.
4. Select Advanced Options for Data Clearing
Switch to the ‘Advanced’ tab to see more detailed data clearing options.
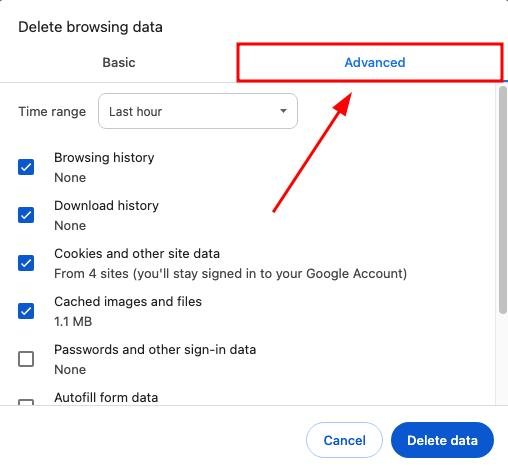
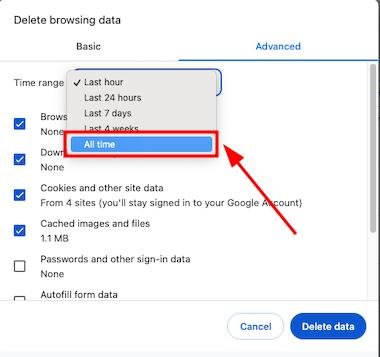
5. Choose to Clear Data for All Time
Set the time range to ‘All time’ to ensure all cached data is included for clearing.
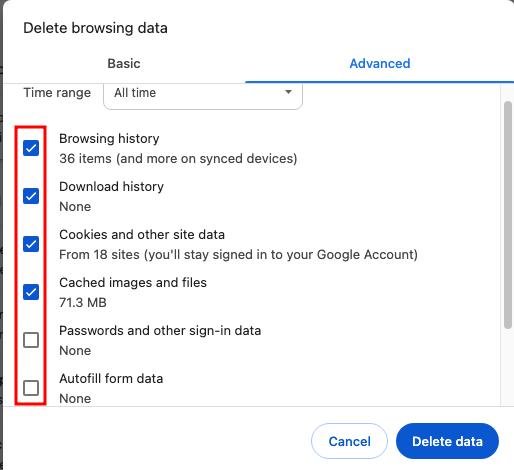
6. Unselect Passwords and Autofill Data, and Check All Others
Make sure to uncheck the boxes for ‘Passwords and other sign-in data’ and ‘Autofill form data’, but ensure all other boxes are checked to thoroughly clear the cache and other selected data.
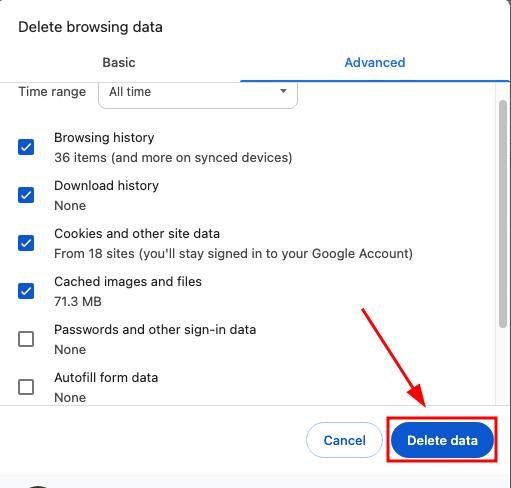
7. Confirm Data Deletion
After selecting the desired settings, click on ‘Delete data’. This action will permanently delete the selected browser data, which can free up space and potentially increase browser performance.
8. Acknowledge the Confirmation Prompt
A prompt confirming the deletion will appear. Click ‘Ok, got it’ to complete the process and close the dialog.

We hope you now have a better understanding on fixing the Chrome flashing black screen issue. If you enjoyed this article, you might also like our articles on how to split the screen in Google Chrome on Android and how to fix the Youtube black screen issue in Google Chrome.