Google Chrome Autoplay Settings (The Ultimate Guide for 2025)
In this tutorial, we will show you exactly how to access the Google Chrome autoplay settings in just a few simple steps. Read on to learn more.
Accessing Google Chrome’s Autoplay Settings
Accessing autoplay settings on Google Chrome can be achieved using two effective methods: the ‘Global Autoplay Settings’ and the ‘AutoplayStopper Extension.’ We will discuss how to use each method in the following sections
Method 1: Adjusting Global Autoplay Settings
Here’s how to access the global autoplay settings in Google Chrome.
1. Open Google Chrome and Go to Settings
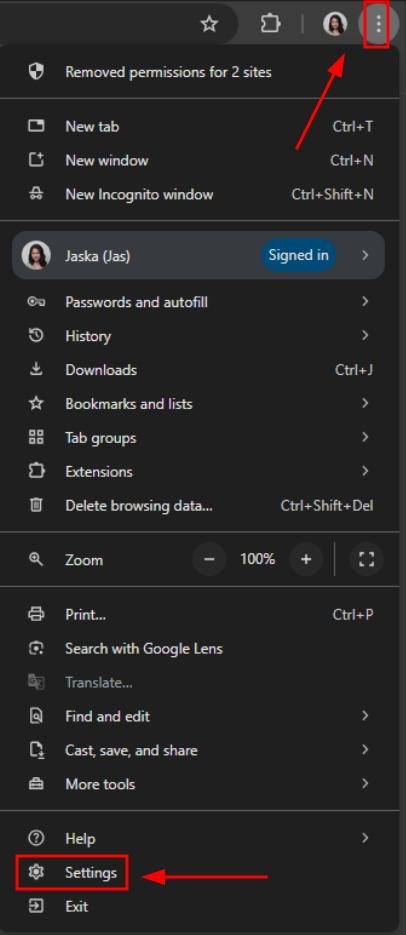
To start, launch Google Chrome and click the three vertical dots (menu icon) in the upper-right corner. From the dropdown, select “Settings.”
2. Go to Privacy and Security Section in Settings
Once in the settings menu, scroll down and find the “Privacy and security” section. This section is where you control how websites interact with your browser.
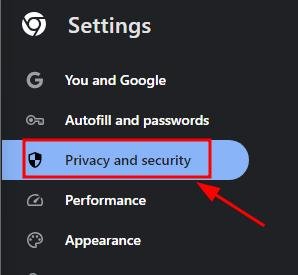
3. Click on Site Settings to Control Website Permissions
In the Privacy and Security section, click “Site settings.” This page contains all the controls for how websites handle permissions like location, cookies, and autoplay.
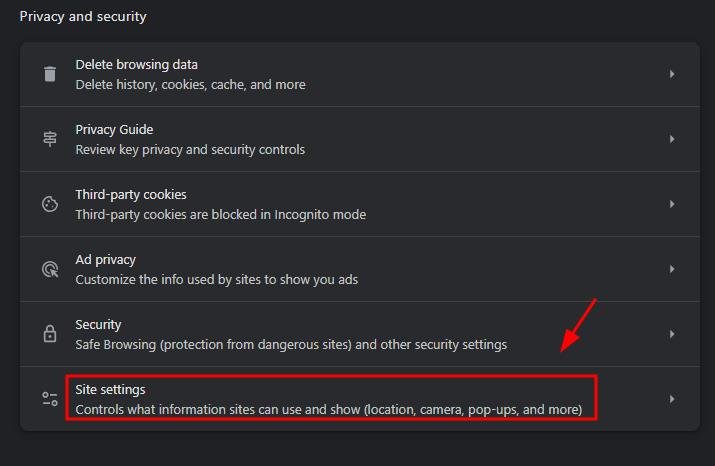
4. Scroll to Additional Content Settings and Find Autoplay
In the Site Settings page, scroll down until you see the “Additional content settings” dropdown.
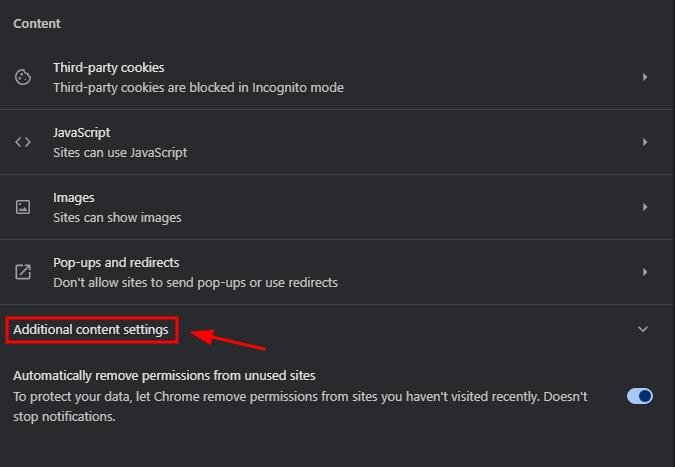
5. Change the Default Sound Setting
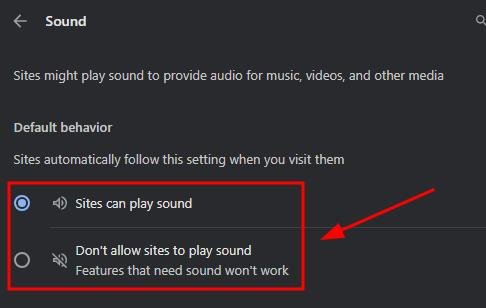
Click on the “Sound” option and decide whether to allow or mute audio on websites by default. This will indirectly control autoplay since most videos will be muted by default.
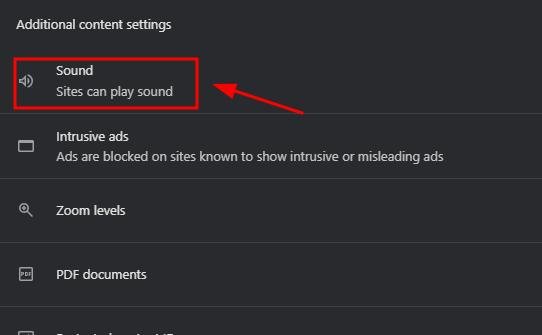
You can choose “Site can play sound” if you want the autoplay to be enabled, while “Don’t allow sites to play sound” will disable the sound to autoplay.
Method 2: Use a Chrome Extension to Control Autoplay
Follow the steps below to manage autoplay settings by using a Chrome extension.
1. Open the Chrome Web Store
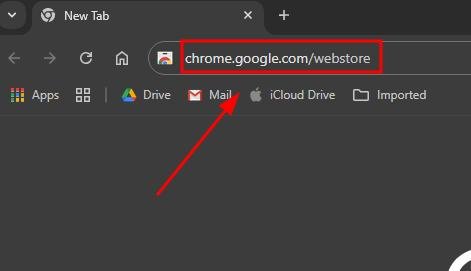
To manage autoplay for media more directly, you can install an extension. Open Google Chrome and navigate to the Chrome Web Store by typing ‘chrome.google.com/webstore’ in the address bar.
2. Search for an Autoplay Control Extension
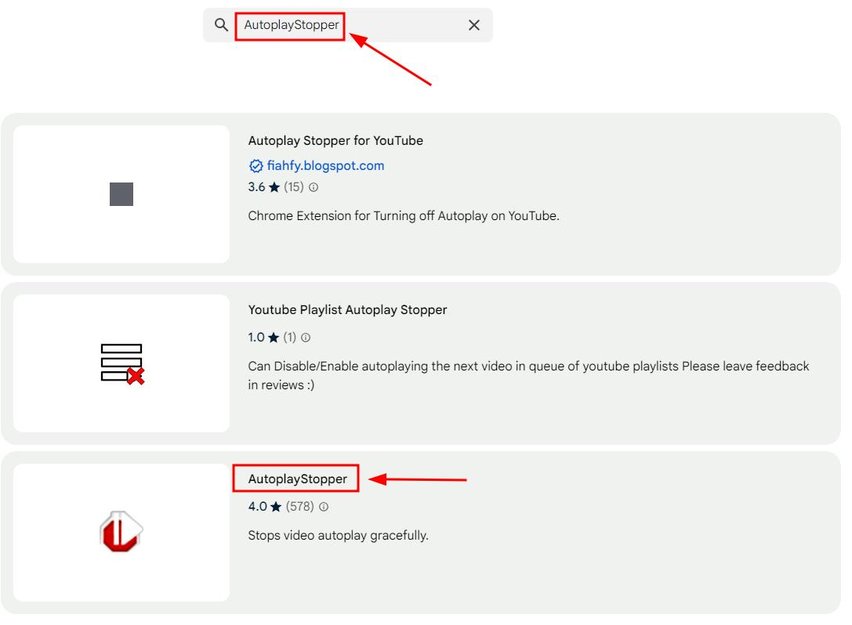
In the Chrome Web Store, use the search bar to find extensions that control autoplay. Search for and click on “AutoplayStopper.”
3. Install an Autoplay Blocker Extension
Tap on “Add to Chrome.”
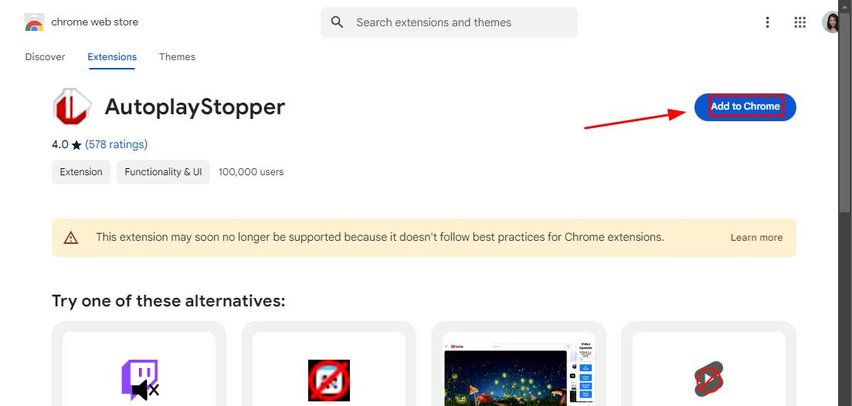
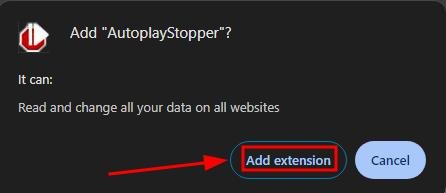
Click on “Add extension” to add it to your Chrome app.
4. Manage Autoplay Settings Through the Extension
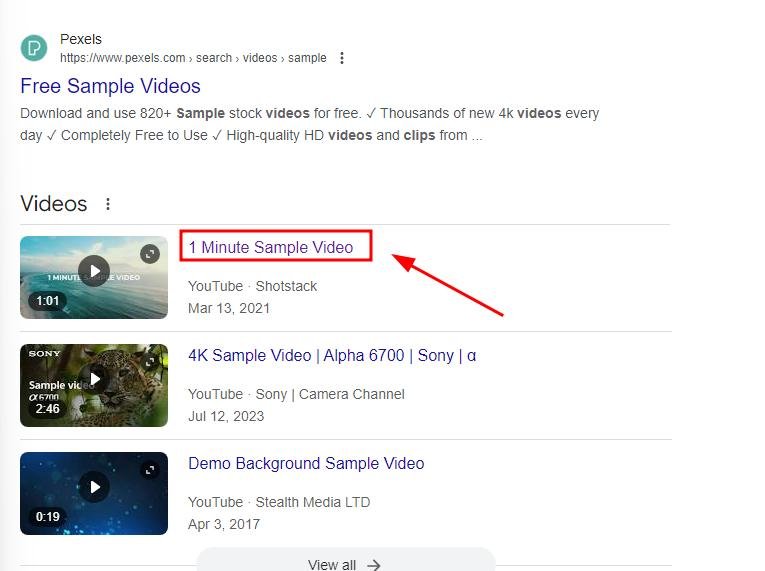
Once the extension is installed, you can manage autoplay settings directly through the extension’s options. Let’s try to search for a video on Youtube and click on it.
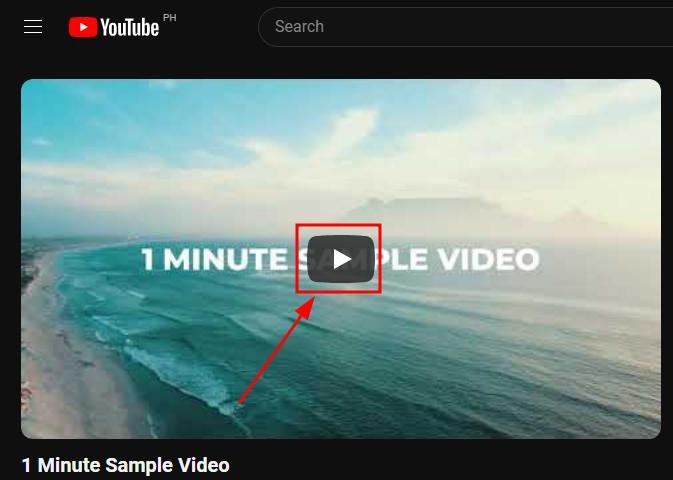
As you can see here, the video pauses by default once it loads.
We hope that you now have a better understanding of adjusting autoplay settings in Google Chrome. If you enjoyed this article, you might want to check our articles on how to access Chrome audio settings and how to check the Chrome mouse settings.

