How to Get Bookmarks to Show on Chrome (Easiest Way in 2025)
In this article, we will show you how to get bookmarks to show in Chrome. Simply follow the steps below.
How to Make Bookmarks Show in Chrome
To always show bookmarks in Chrome, follow the steps below.
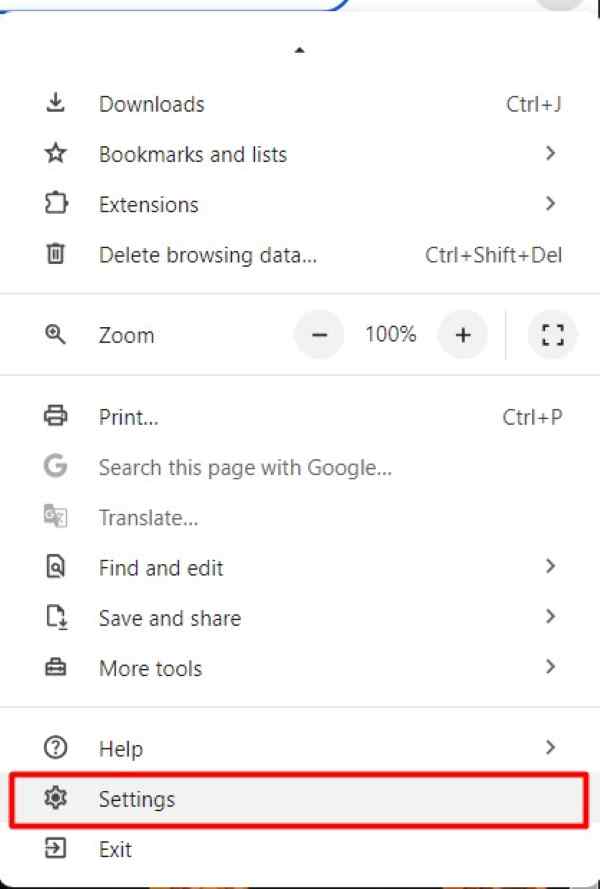
1. Open Google Chrome Settings Menu
Open Google Chrome on your computer. Click the three dots in the top right corner to open the menu. Select “Settings” from the dropdown menu. This is where you can access all the customization options for Chrome.
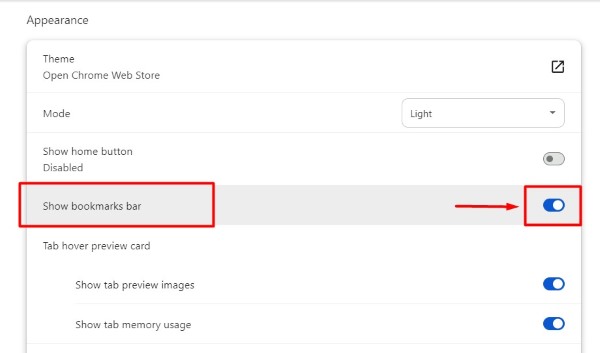
2. Navigate to Appearance Settings
In the Settings menu, find and click on “Appearance” in the left sidebar. This section allows you to change how Chrome looks, including enabling the bookmarks bar.

3. Turn On the Bookmarks Bar
In the Appearance section, find the toggle switch next to “Show bookmarks bar.” Click the switch to turn it on. Your bookmarks bar will now appear below the address bar, making it easy to access your favorite websites.
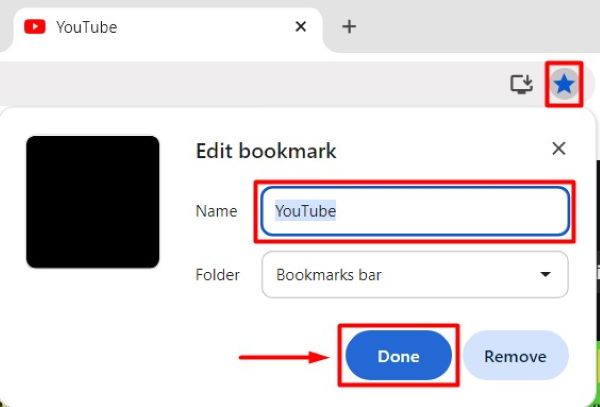
4. Add a Bookmark to the Bookmarks Bar
To add a bookmark, navigate to the webpage you want to bookmark. For example, go to www.youtube.com. Click the star icon in the address bar. Select “Done” from the options. This will save the page to your bookmarks bar for easy access.
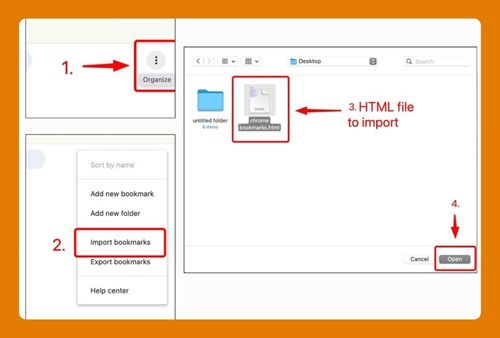
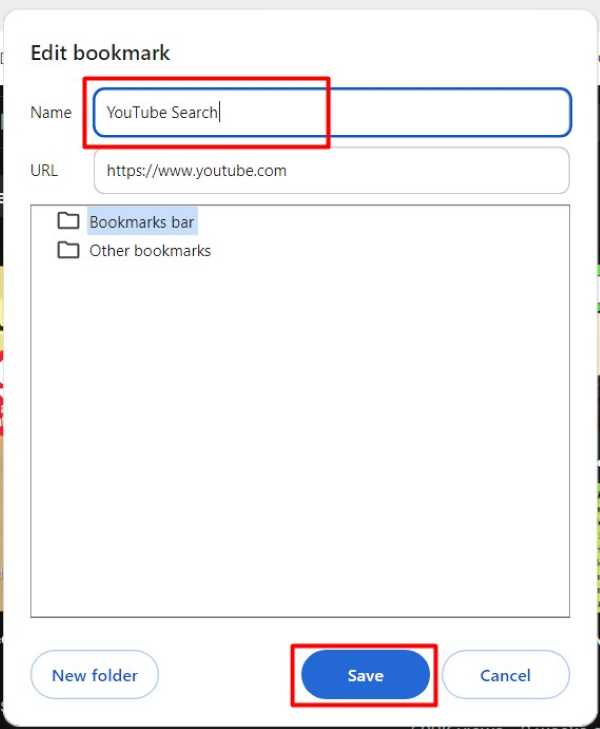
5. Arrange and Organize Your Bookmarks
You can edit bookmarks on the bar. Right-click on a bookmark to rename it or delete it for better organization. For example, you can rename “YouTube” to “YouTube Search” for clarity. Then, click “Save.”
We hope you now have a better understanding of how to get bookmarks to show in Chrome. If you enjoyed this article, you might also like our article on ways to find Chrome bookmarks in File Explorer or our article on ways to fix when bookmarks are not showing in Chrome.