How to Change the Default Search Engine in Chrome (2025 Guide)
In this article, we will show you how to change the default search engine in Chrome. Simply follow the steps below.
Change Default Search Engine in Chrome
To change the default search engine in Chrome, follow the steps below.
1. Open the Chrome Menu by Clicking the Three Dots
Open Google Chrome on your computer. Look at the top-right corner of the browser window and click on the three vertical dots. This opens the Chrome menu.

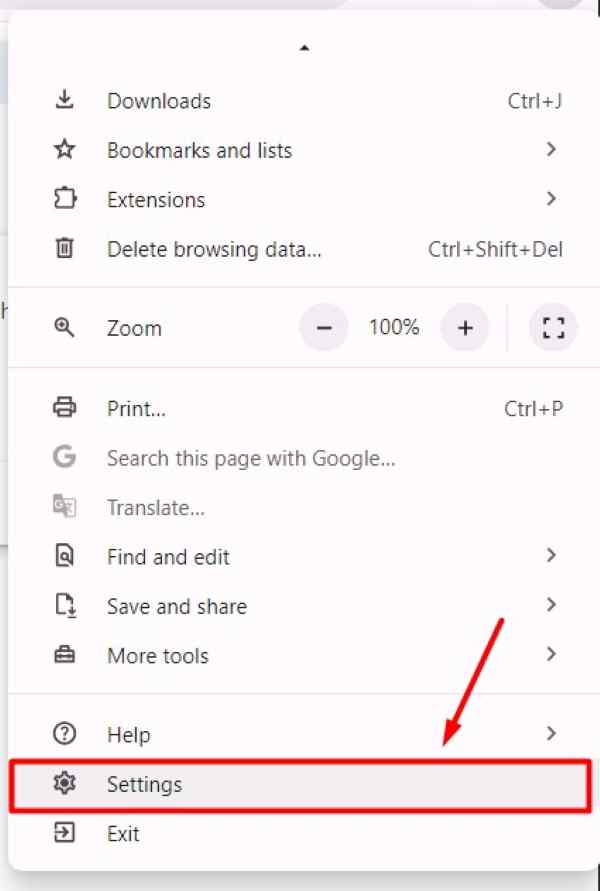
2. Navigate to Settings in the Chrome Menu
In the Chrome menu, you will see several options such as “New Tab,” “New Window,” and “History.” Scroll down and click on “Settings.” This will take you to the settings page where you can change various browser settings.
3. Scroll Down to Locate the Search Engine Section
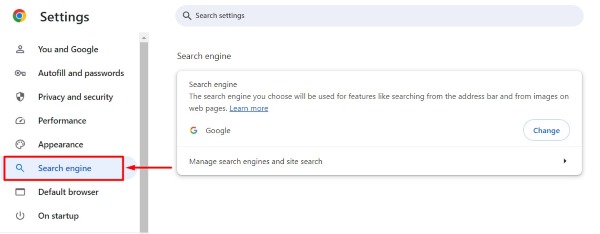
Once you are on the settings page, scroll down until you see the “Search engine” section. This section allows you to manage and change your search engine preferences.
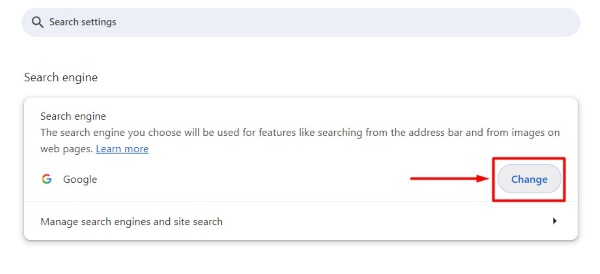
4. Click on “Change” Next to the Current Search Engine
In the “Search engine” section, you will see a button labeled “Change” next to “Search engine used in address bar.” Click on this button to open the search engine options.
5. Choose a New Search Engine and Set It as Default
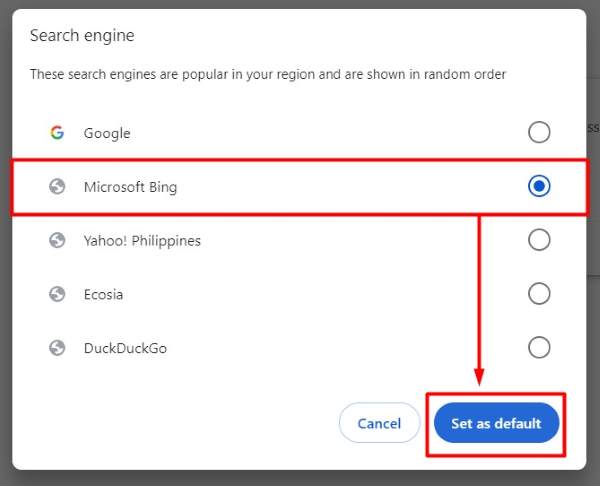
From the list of available search engines, select your preferred search engine, such as “Microsoft Bing.” After selecting it, click on the “Set Default” button.
6. Close the Settings Tab to Save Your Changes
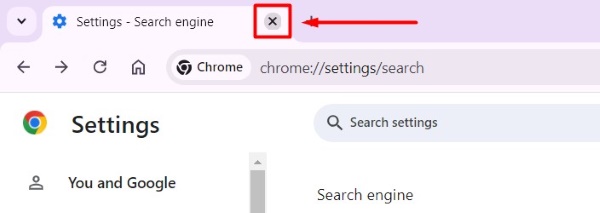
After you have selected and set your preferred search engine as default, Chrome will automatically save your choice. To complete the process, simply close the settings tab. For instance, you can click the “X” on the tab or press “Ctrl + W” on your keyboard.
We hope you now have a better understanding of how to change the default search engine in Chrome. If you enjoyed this article, you might also like our article on ways to change Chrome profile or our article on how to change tab view in Chrome.

