Google Chrome Video Quality Settings (How to Access It in 2025)
In this tutorial, we will show you exactly how to access Chrome video quality settings in just a few simple steps. Read on to learn more.

Adjust Video Quality Settings in Chrome
Adjusting video quality settings on Chrome can be achieved using two effective methods: ‘Adjust Settings on the Specific Streaming Site’ and ‘Disabling Graphics Acceleration.’ We will discuss how to use each method in the following sections.
Method 1: Adjust Settings on the Specific Streaming Site
Follow the steps below to adjust video quality settings on Chrome using the site’s quality settings.
1. Go to a Video Streaming Site
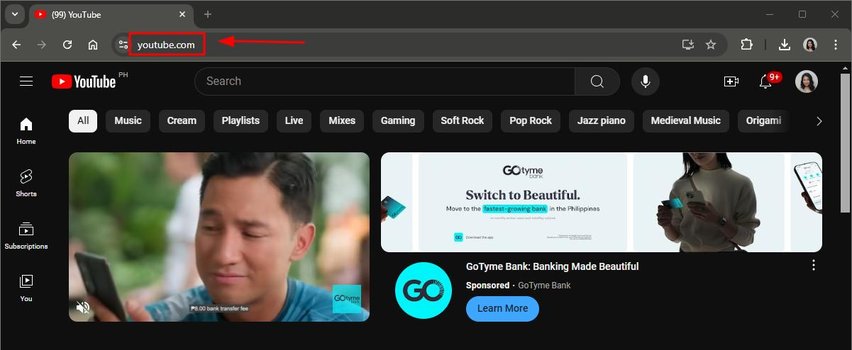
Visit a video streaming website, like YouTube or Netflix. You need a video playing to adjust its quality settings. In our example, let’s use Youtube.
2. Start Playing a Video
Select and play a video on the streaming site. The video needs to be actively playing to access quality settings.

3. Click the Gear Icon for Video Settings
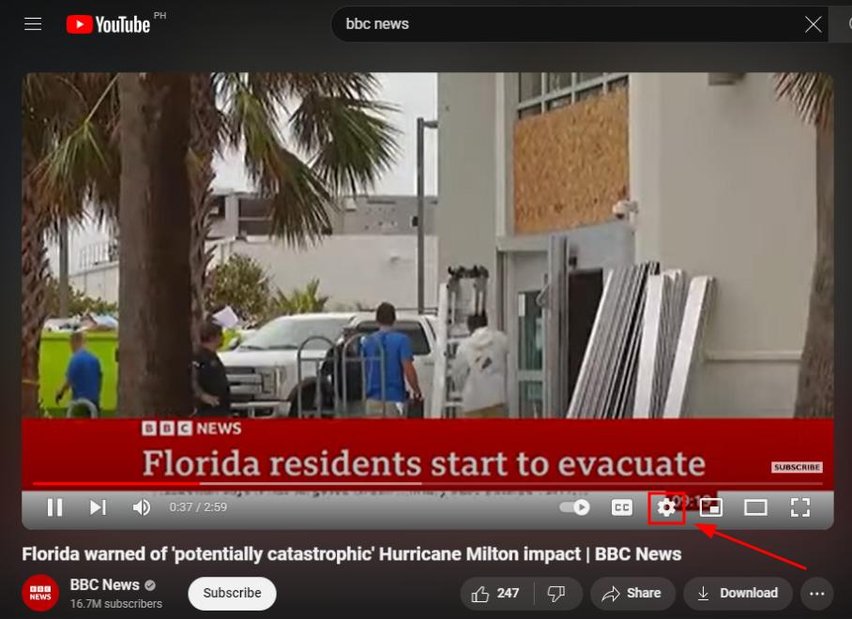
Locate the gear icon in the bottom right corner of the video player. Click on this icon to access video options, including quality settings.
4. Select the Video Quality Option
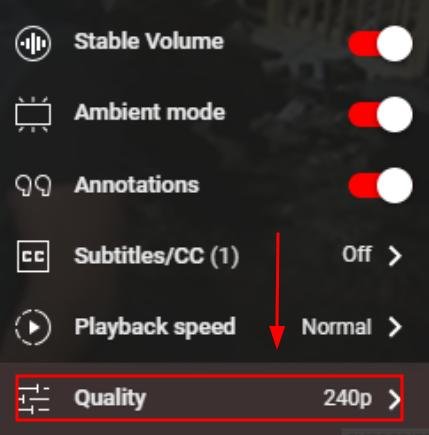
Once in the settings menu, choose the video quality or resolution option. This will open a list of available quality levels for the video.
5. Pick Your Preferred Video Resolution
Choose the resolution that best fits your internet speed and viewing preference. Higher resolutions provide better quality but may require faster internet.
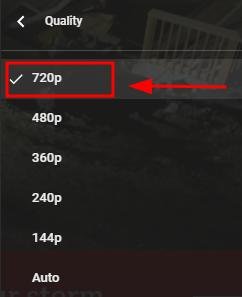
6. Confirm and Close the Settings Menu
Close the settings menu by clicking outside of it or pressing a close button. The video will now play at the quality you selected.
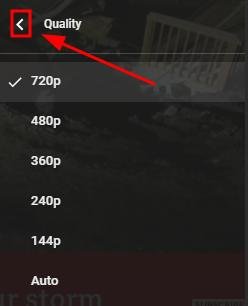
7. Test the Video Playback to Ensure Smooth Performance
Watch the video for a few seconds. If the video lags or buffers, try selecting a lower resolution for smoother playback.

Method 2: Disabling Graphics Acceleration
Here’s how to adjust video quality settings in Chrome by disabling graphics acceleration:
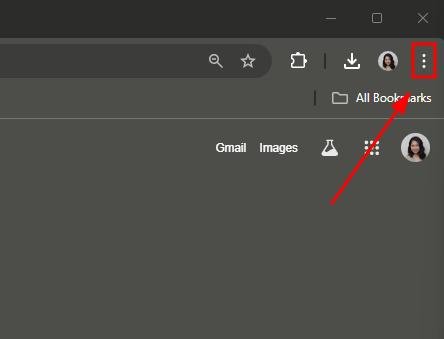
1. Open Chrome Settings Menu
Click the three-dot menu in the top-right corner of the Chrome browser.
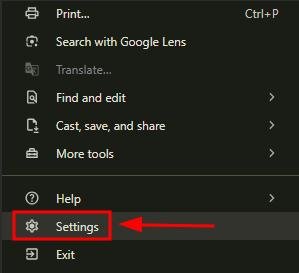
From the dropdown, select “Settings” to access Chrome’s configuration options.
3. Locate the Graphics or Hardware Acceleration Option
On the Settings page, find “System.” Under this, you’ll find the option “Use graphics acceleration when available.”
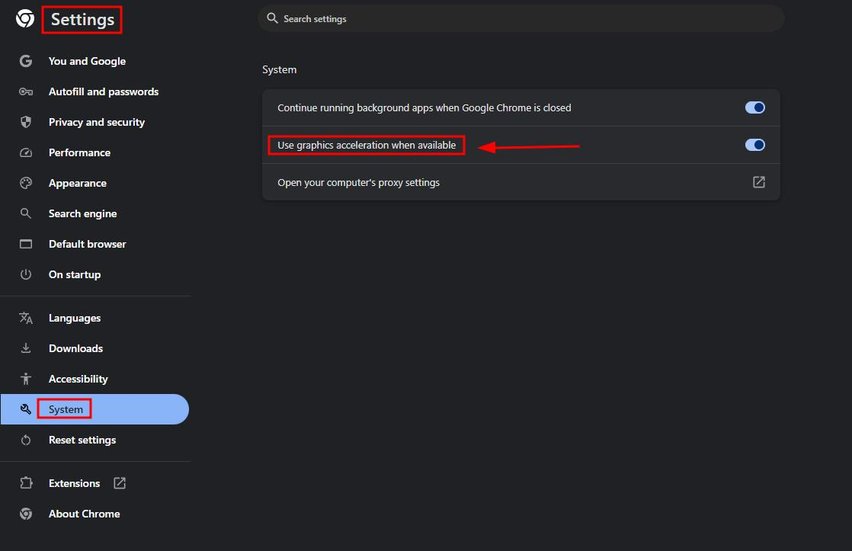
4. Disable Graphics or Hardware Acceleration
Toggle the switch next to “Use graphics acceleration when available” to turn it off. This will disable hardware acceleration for Chrome.
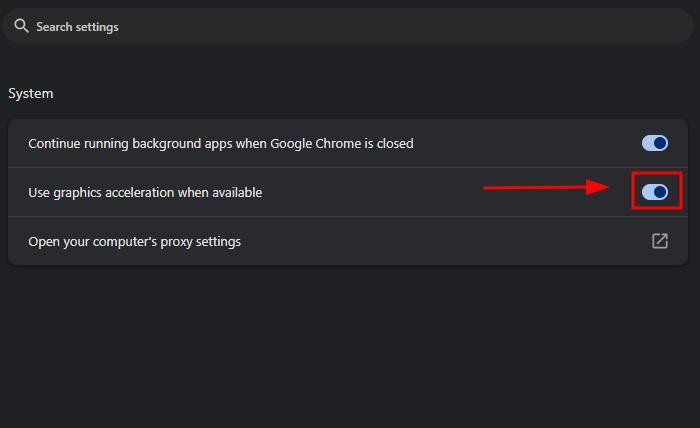
5. Relaunch Chrome to Apply the Changes
Once you turn off hardware acceleration, Chrome will prompt you to relaunch the browser. Click the “Relaunch” button for the changes to take effect.
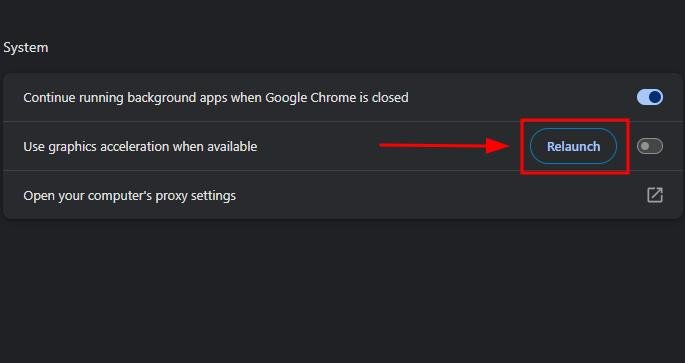
6. Check Video Playback After Disabling
After relaunching, go back to a video streaming site and play a video. If playback is smoother or any issues are resolved, the hardware acceleration adjustment was successful.

We hope that you now have a better understanding of how to change video quality settings in Chrome. If you enjoyed this article, you might want to check our articles on how to access Chrome’s advanced settings’ URL and how to access Chrome autofill settings on iPhone.


