Google Chrome Resolution Settings (The Ultimate Guide for 2025)
In this tutorial, we will show you exactly how to adjust Chrome resolution settings in just a few simple steps. Read on to learn more.
Adjust Chrome Resolution Settings
Follow the steps below to change resolution settings in Chrome.
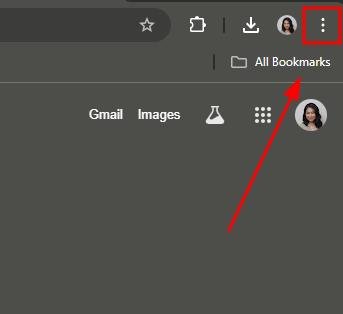
1. Click the Menu Icon in the Top-Right Corner
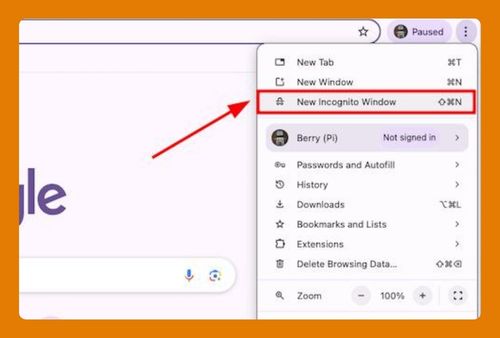
To start adjusting your resolution settings, click the three vertical dots located in the top-right corner of your Chrome browser. This will open a drop-down menu.
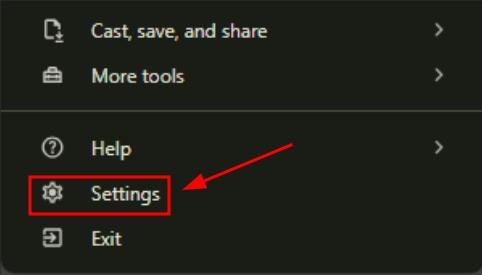
2. Select “Settings” from the Drop-Down Menu
From the menu, find and click on “Settings.” This will take you to the main configuration page, where you can change various browser settings.
3. Scroll Down and Click on “Appearance” to Expand More Options
On the Settings page, scroll down to the bottom and click on “Appearance.” This will reveal more settings, including options for display and system adjustments.
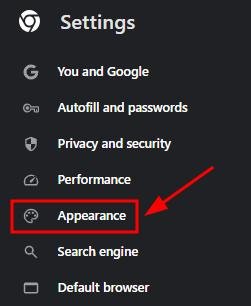
4. Find “Page Zoom” in the Appearance Section and Adjust the Zoom Level
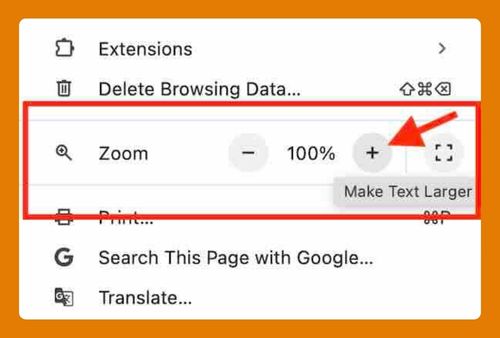
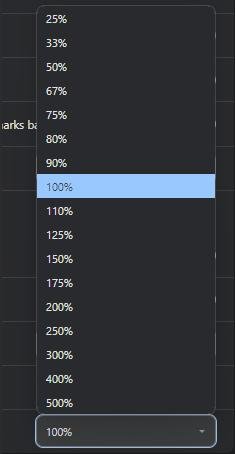
In the “Appearance” section, locate the “Page Zoom” option. Adjust the zoom level by clicking on the drop-down arrow.
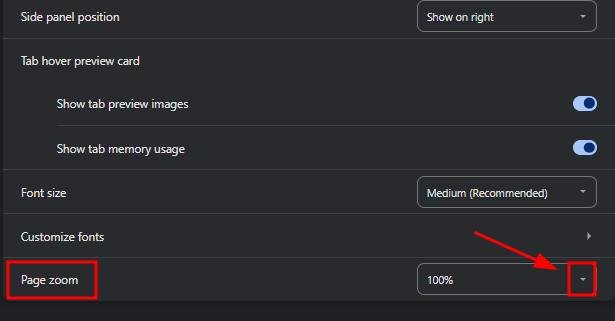
Select a zoom level to make the content on your screen larger or smaller, as needed.
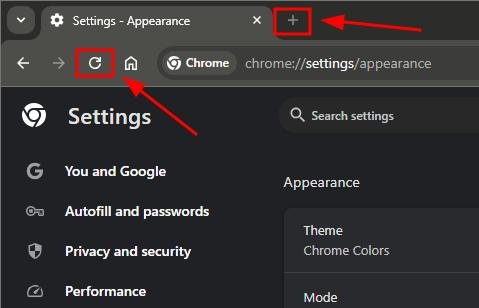
5. Open a New Tab or Reload a Webpage to Test the Zoom Settings
After adjusting the zoom, open a new tab by clicking “+” or reload an existing webpage by clicking the reload icon to check the effects of your changes. Ensure the content is now displayed at a comfortable size.
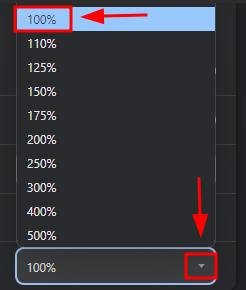
6. Reset the Zoom Settings to Default if Needed
If the zoom level does not suit your preference, return to the “Appearance” section in Settings. Click on the drop-down arrow next to the zoom settings and select “100%” to revert to Chrome’s original size.
We hope that you now have a better understanding of changing Chrome resolution settings. If you enjoyed this article, you might want to check our articles on how to access Chrome cookies settings on Android and how to save Chrome settings.

