Google Chrome Bluetooth Settings (The Ultimate Guide for 2025)
In this tutorial, we will show you exactly how to manage Chrome Bluetooth settings in just a few simple steps. Read on to learn more.
Access Google Chrome’s Bluetooth Settings
Accessing Chrome Bluetooth settings can be achieved using two effective methods: using the ‘Chrome’s Settings’ and using the ‘Site Information Icon.’ We will discuss how to use each method in the following sections.
Method 1: Using Chrome’s Settings
Here’s how you can access Bluetooth settings using Chrome’s main settings.
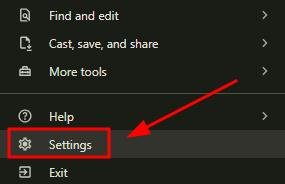
1. Click the Three-Dot Menu to Access Settings
Click the three-dot menu in the upper-right corner of the Chrome window.

Select “Settings” from the dropdown list to open Chrome’s settings page.
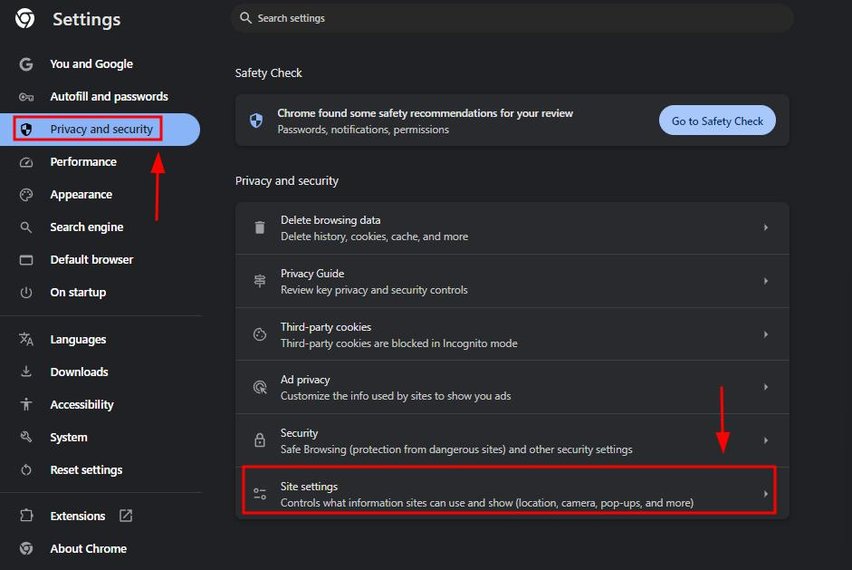
2. Click on Site Settings Under Privacy and Security
Under “Privacy and security,” click on “Site settings.” Site settings control permissions for different websites, including Bluetooth access.
3. Locate Bluetooth Devices Permissions
Scroll down to the “Permissions” section. Click on “Additional permissions” if needed.
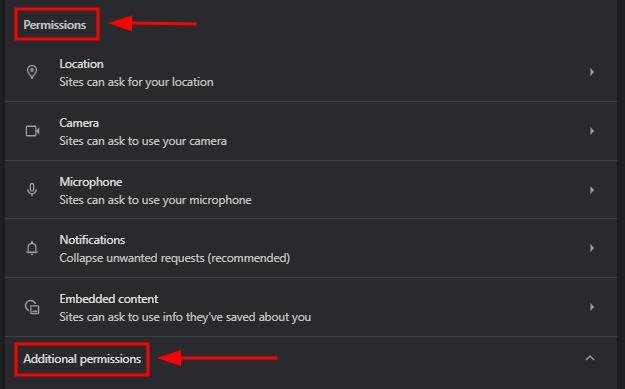
Click on “Bluetooth devices.” This is where you can manage how Chrome handles Bluetooth requests.
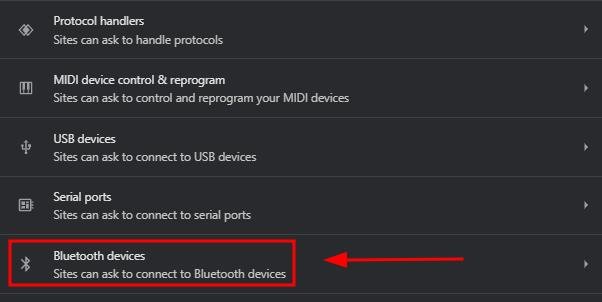
If there is no Bluetooth devices option under Additional permissions, the setting might be disabled by default. Go to chrome://flags/#enable-web-bluetooth-new-permissions-backend.

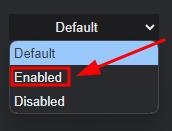
Click on the dropdown arrow beside Default to change it.

Select “Enable.”
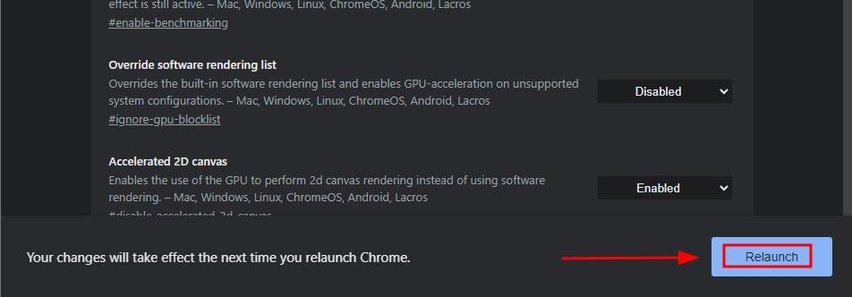
Then, click on “Relaunch” to refresh the settings. You can now access Bluetooth devices under Additional permissions.
5. Allow or Block Bluetooth Device Access
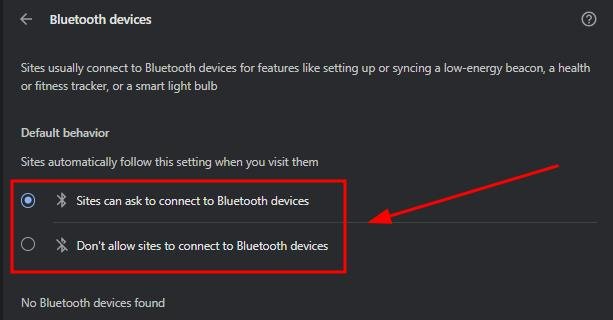
In the Bluetooth devices settings, you can allow or block websites from asking to access Bluetooth devices. Adjust these options according to your preferences. You can see here that by default, sites can ask to connect to Bluetooth devices.
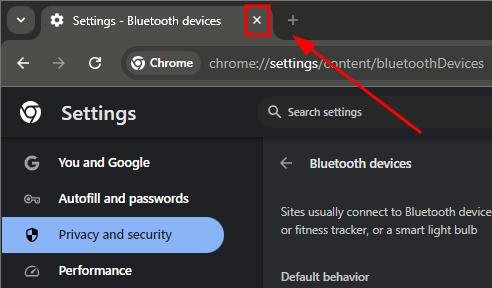
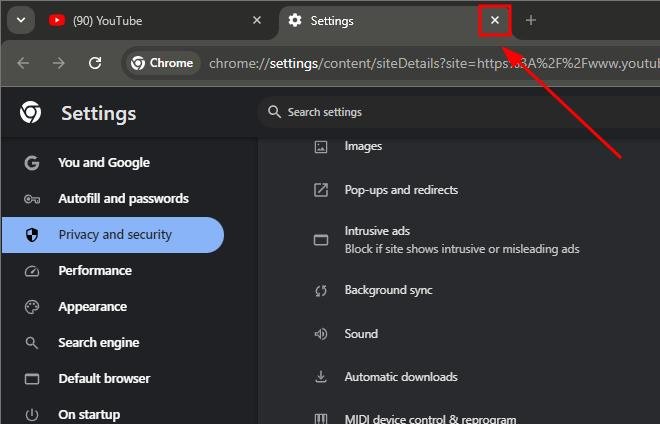
6. Close the Settings Tab to Save Changes
After adjusting the Bluetooth settings, simply close the Settings tab by clicking “x.” Chrome will automatically save your changes.
Method 2: Using the Site Information Icon
Follow the steps below to check a site’s Bluetooth settings using the Site Information icon.
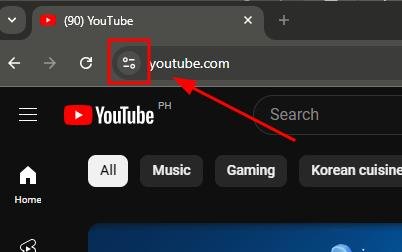
1. Click on the Site Information Icon in the Address Bar
Look at the left side of the address bar, where the URL is displayed. Click on the “site information” icon—this could be a lock icon for secure websites or an information icon (ⓘ) if the site is not fully secure. This icon allows you to view details about the site’s security and permissions.
2. View Site Permissions
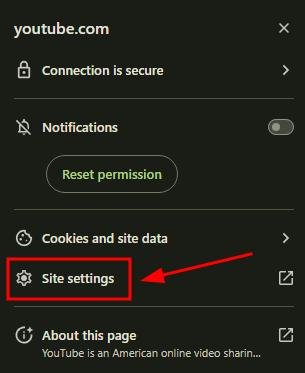
After clicking the lock icon, a small menu will appear. Click on “Site settings” to view and adjust the permissions for the website, including Bluetooth.
3. Locate Bluetooth Permissions
In the Site Settings page, scroll to find permissions such as camera, microphone, location, and possibly Bluetooth (depending on whether the site has requested Bluetooth access in the past). Here you can change the setting to “Allow,” “Block,” or “Ask.”
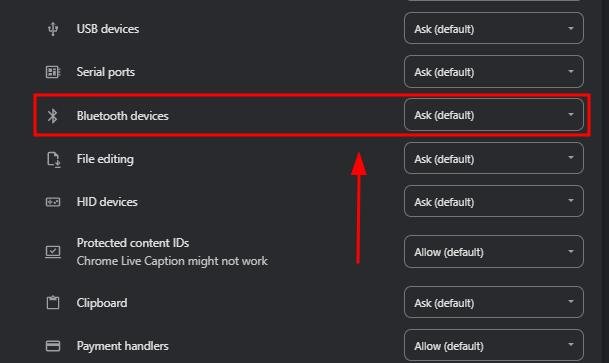
Choose whatever suits your preference here.

4. Close the Tab to Save Changes
After adjusting the permissions, simply close the settings tab. Chrome will automatically save any changes you make.
We hope that you now have a better understanding of how to access Bluetooth settings in Chrome. If you enjoyed this article, you might want to check our articles on how to access Google Chrome proxy settings and how to backup Chrome settings without sync.

