Google Chrome Proxy Settings (The Ultimate Guide for 2025)
In this tutorial, we will show you exactly how to access Chrome proxy settings in just a few simple steps. Read on to learn more.
How to Check Proxy Settings in Chrome
Follow the steps below to check proxy settings on Chrome.
1. Open Chrome and Click the Three Dots Menu to Access Settings
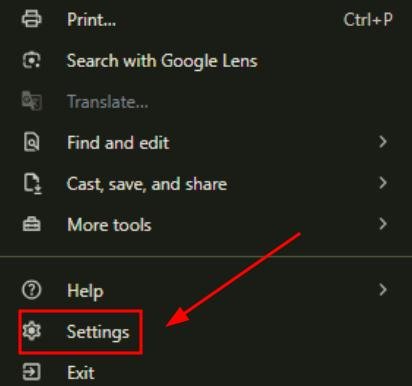
Open Chrome, then click the three dots in the top-right corner of the window.
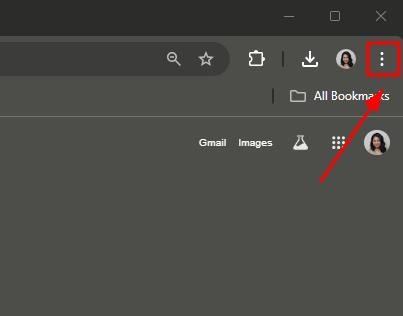
Select “Settings” from the menu.
2. Locate “System” Section and Open Computer’s Proxy Settings
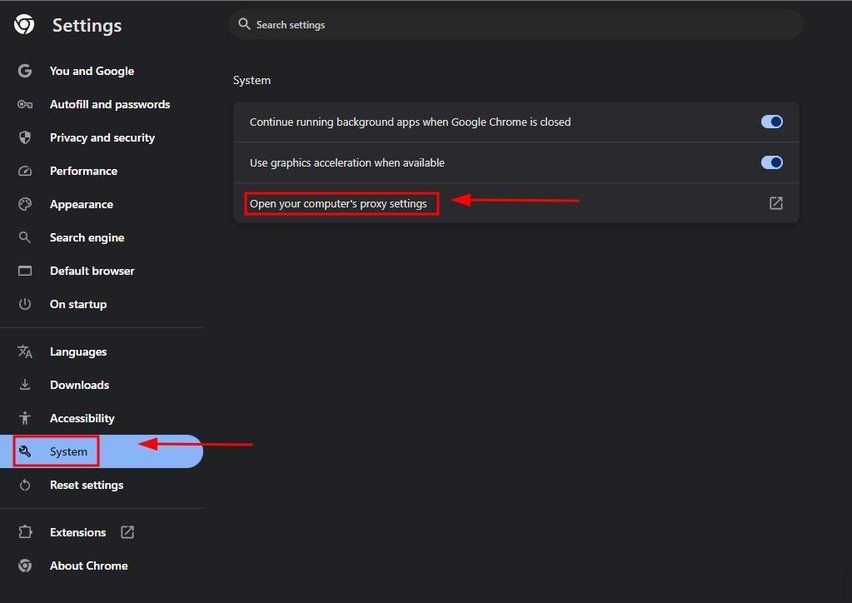
Find the “System” section under Advanced settings. Click “Open your computer’s proxy settings.”
3. Configure Proxy Settings in the System Network Options
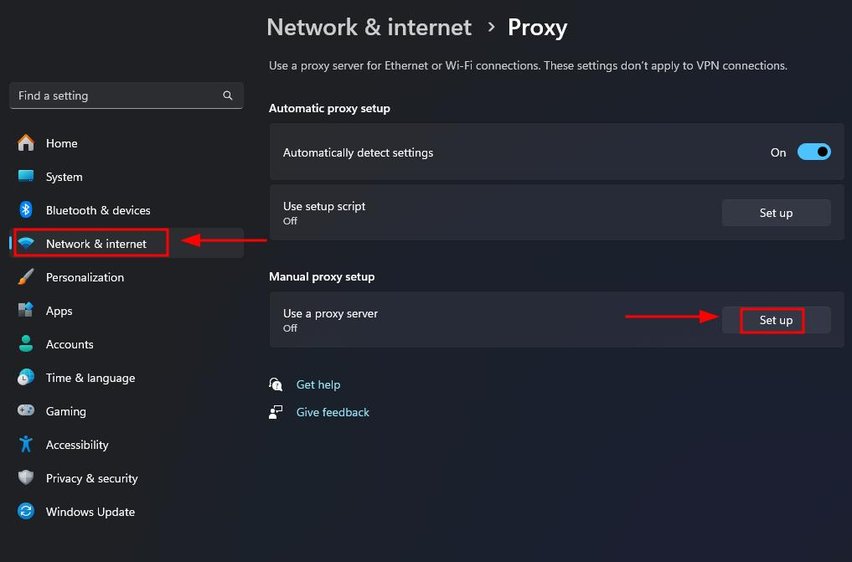
In the system settings, under “Network & internet,” locate the proxy configuration options. Here, let’s click “Set up” to configure your proxy setup manually.
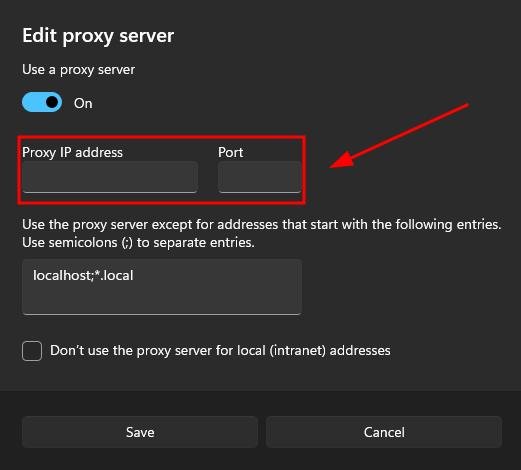
Click this switch to turn on using a proxy server.
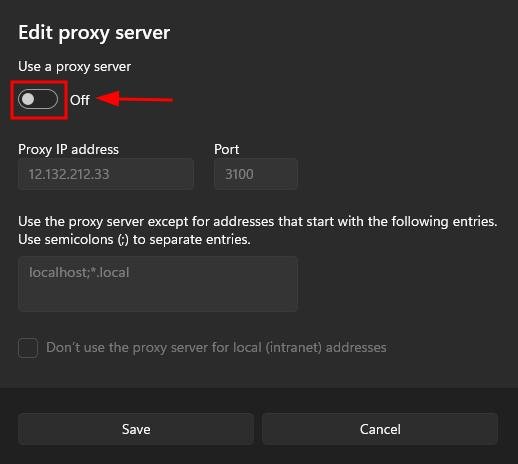
Enter the correct proxy server details provided to you under the “Proxy IP address” and “Port” fields.
4. Save Changes to Apply New Proxy Settings
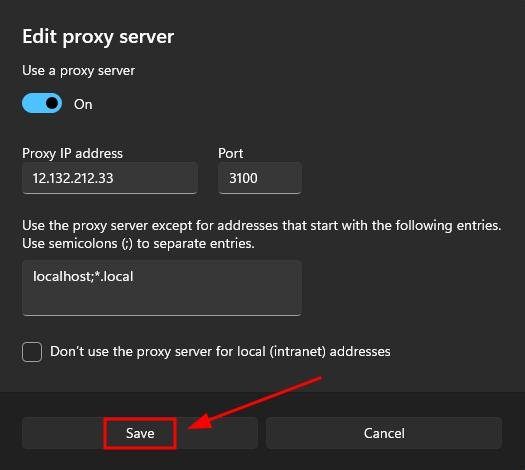
After entering the proxy information, save your changes by clicking “Save.” This ensures Chrome uses the updated proxy settings.
We hope that you now have a better understanding of how to check proxy settings on Google Chrome. If you enjoyed this article, you might want to check our articles on how to reset settings in Chrome and how to access Chrome settings for Bluetooth.

