How to Remove Email Address from Autofill in Chrome (2025)
In this article, we’ll show you how to remove an email address from Chrome Autofill. Simply follow the steps below.
Remove an Email Address from Chrome Autofill
Google Chrome saves your email addresses to help you fill out forms faster. If you need to remove an outdated or incorrect email, here’s how to do it easily.
1. Open Chrome Settings
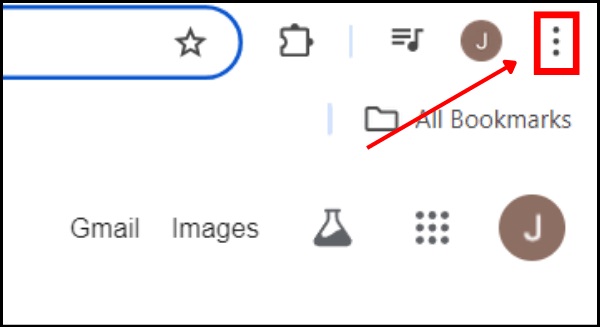
Start by opening Google Chrome on your computer. In the top-right corner, you’ll notice three vertical dots. Click on these dots to open a dropdown menu.
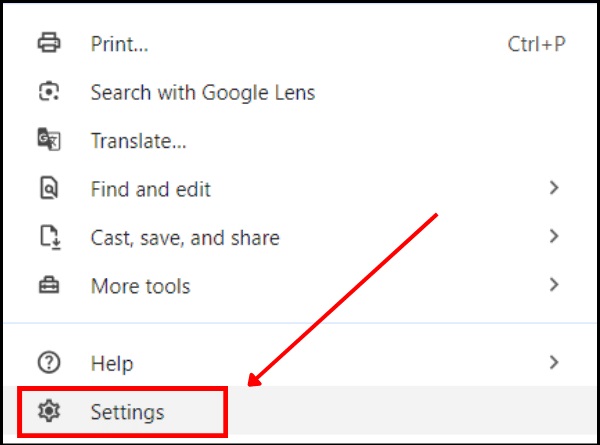
From the menu that appears, select “Settings”.
2. Go to Autofill Settings
Once you’re in the Settings menu, you’ll see a list of options on the left-hand side. Scroll down until you find the section labeled “Autofill”. Click on it to expand the options.
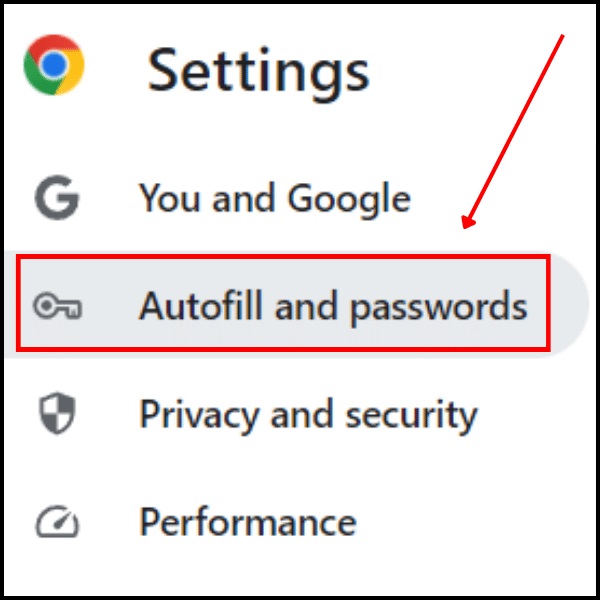
Next, click on “Addresses and more” under the Autofill section.
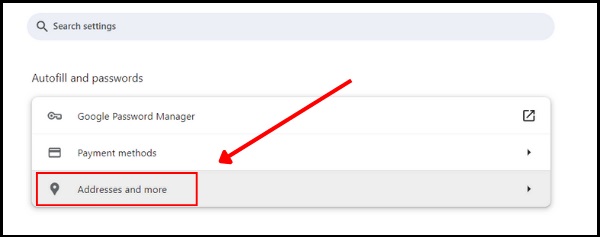
3. Find and Remove the Email Address
Now, you’ll see a list of all the saved addresses, including your email addresses. Scroll through the list to find the email address you want to remove.
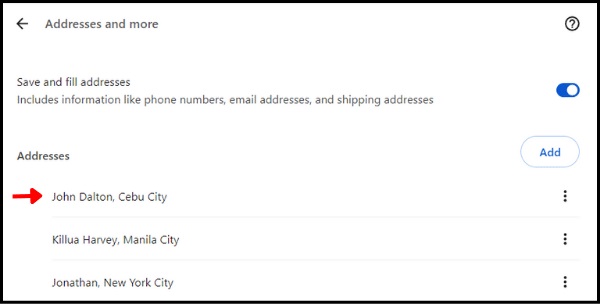
To delete it, click on the three vertical dots next to the email address.
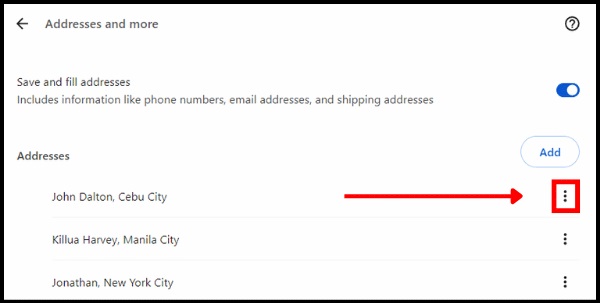
A small menu will appear—select “Delete”.
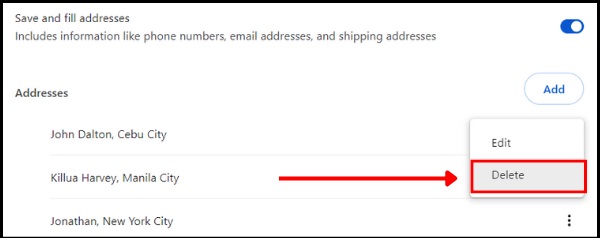
4. Confirm You Want to Delete It
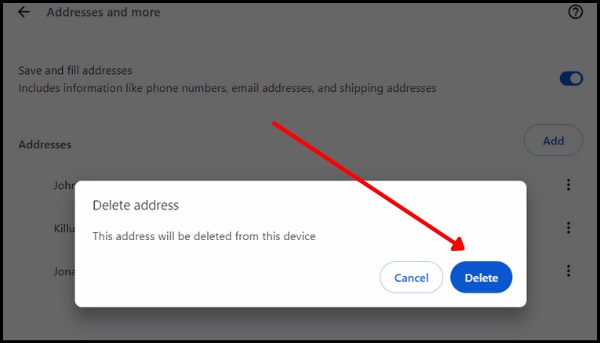
In some cases, a confirmation box might pop up asking if you’re sure you want to delete the email address. To finalize, click “Delete” again.
We hope that you now have a better understanding of how to remove autofill email address in Google Chrome. If you enjoyed this article, you might also like our article on how to add a chrome extension to toolbar and how to add search engine in chrome.

