Save Image as Type Using a Chrome Extension (2025 Update)
In this article, we will show you how to use the Chrome extension to save the image as a specific file type. Simply follow the steps below.

Save the Image as Type With a Chrome Extension
Follow the steps below to save the image as a specific file type using the Chrome extension.
1. Add an Image Saving Extension to Your Chrome Browser
First, you need to add a Chrome extension that allows you to save images in different formats. Open a new tab in your Chrome browser and go to the Chrome Web Store by typing “chrome.google.com/webstore” into the address bar.

In the search bar of the store, type “Save Image As Type” or a similar keyword and press Enter.

Browse through the options and find an extension that suits your needs. Then, click on it. For example, we will choose the “Save image as Type” extension.

Press the “Add to Chrome” button to install it on your browser.

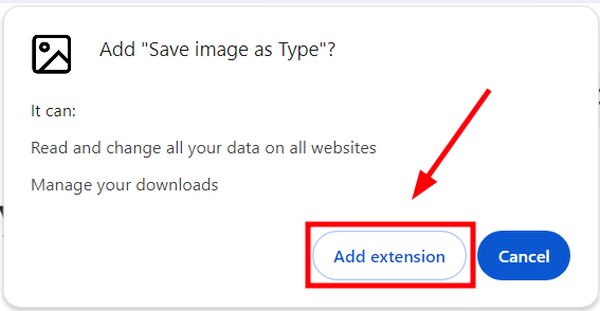
You will see a confirmation dialog like the one below. Click “Add extension” to complete the installation.
2. Locate and Display the Image You Wish to Save
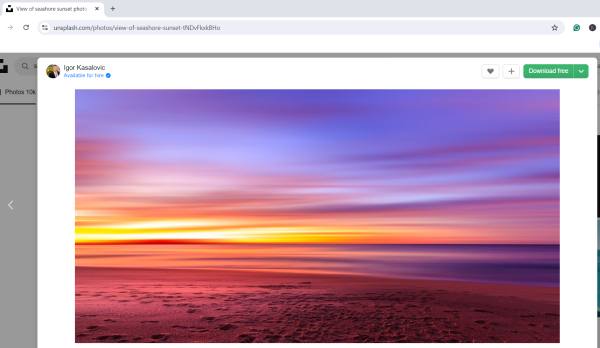
Navigate to the website where the image you want to save is located. Ensure the image is fully visible on your screen. If the image is part of a slideshow or gallery, navigate to the specific image you are interested in saving.
In our example, we will use the website “Unsplash” to find an image. We have chosen an image of the view of the seashore at sunset.
3. Initiate the Save Process by Right-Clicking on the Image
Right-click directly on the image you want to save. A context menu will pop up on your screen. Look for the option that mentions saving the image, which should be added by the Chrome extension you installed earlier. This option might be labeled “Save image as type” or similar.
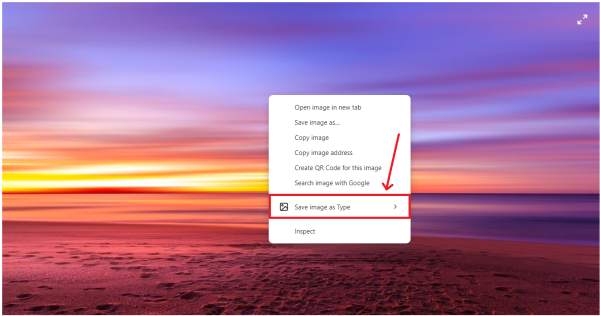
4. Select the File Format for the Image from the Context Menu
When you hover over or click the “Save image as type” option in the context menu, a submenu will appear listing various file formats like PNG, JPEG, or GIF. Choose the format you prefer by clicking on it. This action prepares the image to be saved in the selected format.
For example, we will choose to save our image in JPG format.
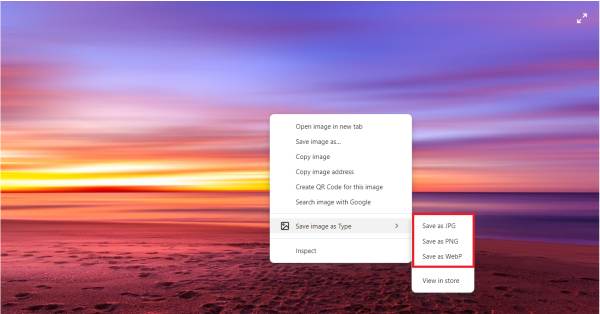
5. Choose Where to Save the Image on Your Computer
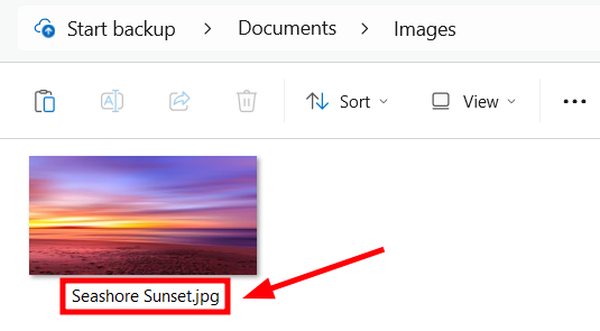
After selecting the format, a file-saving dialog box will appear. Use this box to navigate through your computer’s directories and choose a location to save the image. For example, we will save our image in the ‘Images’ folder.
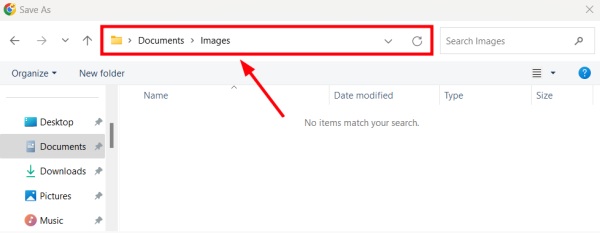
You can also type in a new file name in the dialog box if you wish to rename the image from its original web name. For example, we will name our image “Seashore Sunset”. Then, click “Save” to proceed.
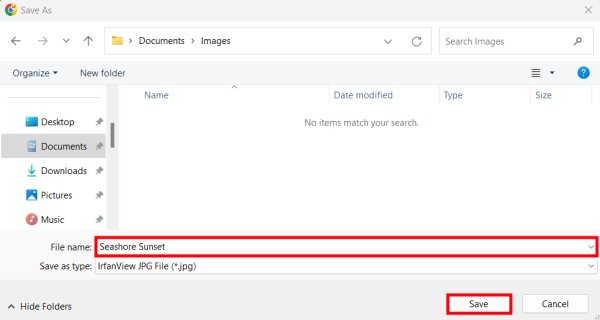
6. Confirm the Image Has Been Saved Successfully
To ensure the image was saved correctly, navigate to the folder where you saved it. Locate the file and double-click it to open. Check that it opens properly and that the quality and format are as expected. This step confirms the image is saved in the desired format and is accessible for your use.
We hope that you now have a better understanding of how to save an image as a type using a Google Chrome extension. If you enjoyed this article, you might also like our articles on how to save WebP as JPG using a Chrome extension and how to remove saved usernames in Chrome.

