Chrome Pop-up Settings (The Ultimate Guide for 2025)
In this article, we will show you how to manage pop-up settings in Chrome. Simply follow the steps below.
Pop-up Blocker Settings in Chrome
Follow the steps below to manage the pop-up settings in Chrome.
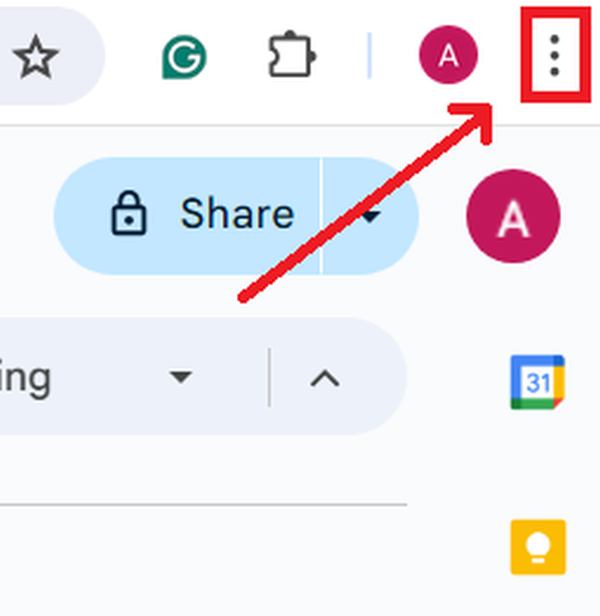
1. Click the Three Dots in the Upper-Right Corner to Access Chrome’s Main Menu
To access the settings and other features, click on the three vertical dots located at the top-right corner of your Chrome browser window. This will open a dropdown menu with various options.
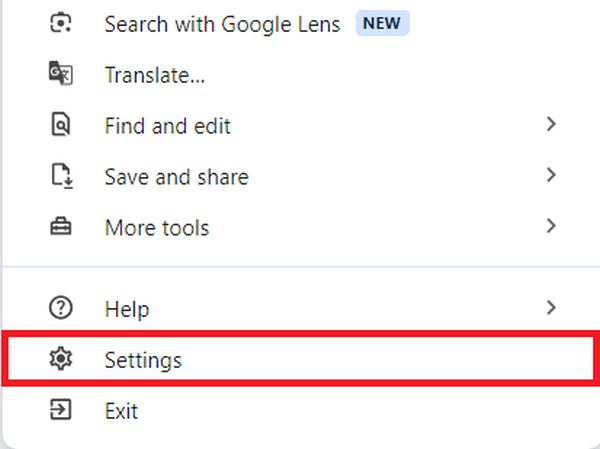
2. Select ‘Settings’ from the Dropdown Menu
From the dropdown menu that appears, click on ‘Settings’ to proceed to Chrome’s settings page. This is where you can adjust settings related to your browsing experience, account, and customization of Chrome.
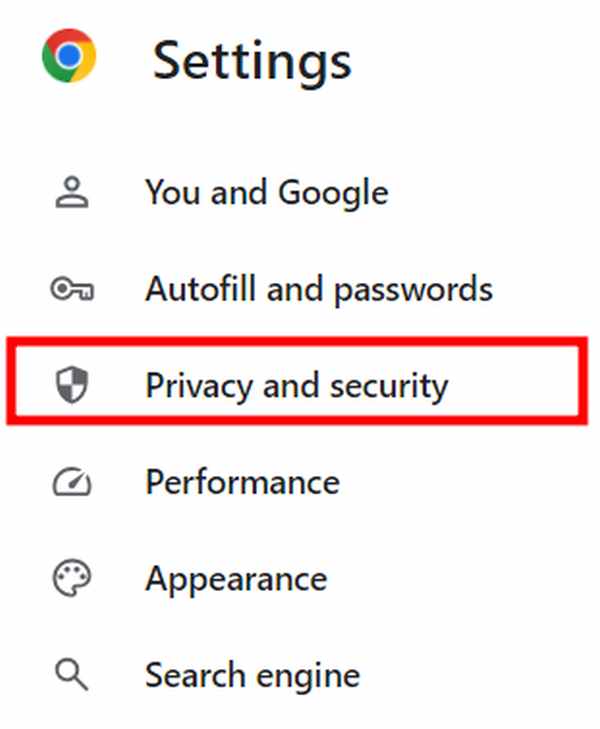
3. Scroll to ‘Privacy and Security’ and Click to Open This Section
On the settings page, find and click on the ‘Privacy and security’ section. This part of the settings deals with options that affect your privacy while browsing, such as cookies, security enhancements, and data management.
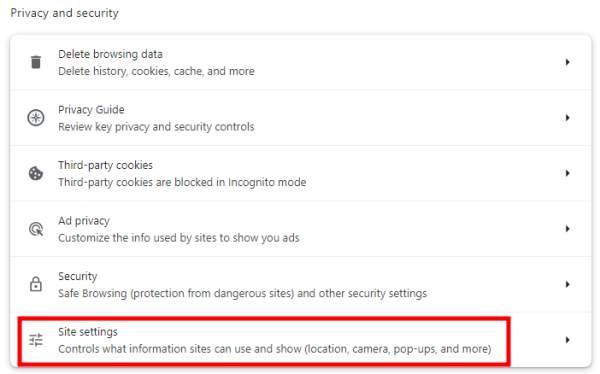
4. Find and Click on ‘Site Settings’ to Adjust Website Permissions
After clicking ‘Privacy and security,’ look for the ‘Site settings’ option. This option allows you to manage permissions for websites on things like cookies, location, and camera access. Click ‘Site settings’ to proceed.
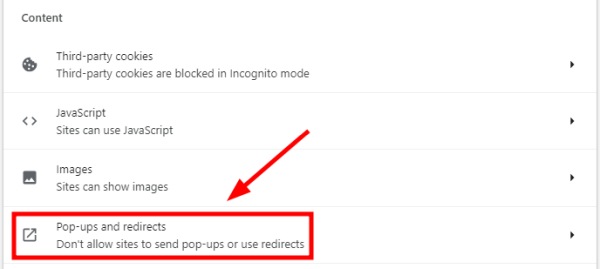
5. Scroll to ‘Pop-ups and Redirects’ and Click to Modify Their Settings
Within ‘Site settings,’ scroll down until you find the ‘Pop-ups and redirects’ option. This section lets you control whether websites can show pop-ups and redirect you to other sites. Click it to open and modify these settings.
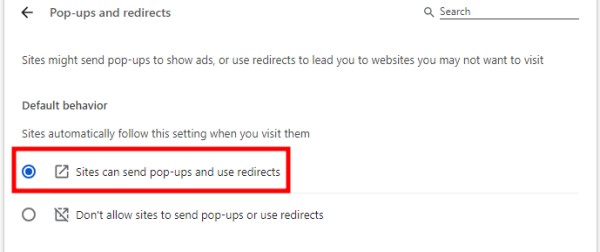
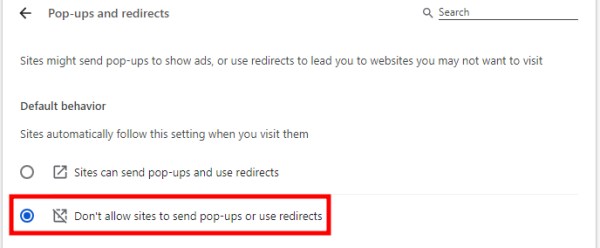
6. Choose How Chrome Handles Pop-ups and Redirects
You will see options for how pop-ups and redirects are handled. If you want to allow all sites to show pop-ups and use redirects, click the radio button next to “Sites can send pop-ups and use redirects.”
If you prefer to block these actions, click the radio button next to “Don’t allow sites to send pop-ups or use redirects.” This setting helps prevent unwanted ads and redirects.
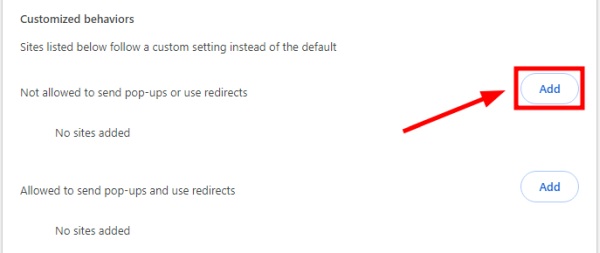
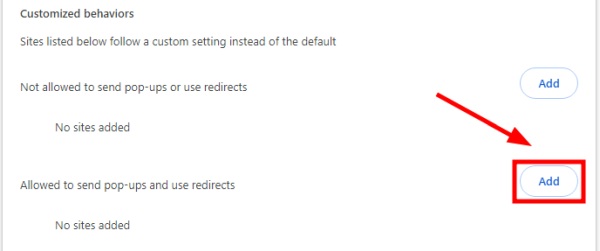
7. Use the ‘Add’ Buttons to Customize Permissions for Individual Websites
For more personalized control, you can specify which websites are allowed or not allowed to send pop-ups. To block a specific site, click ‘Add’ under the ‘Not allowed to send pop-ups or use redirects’ section.
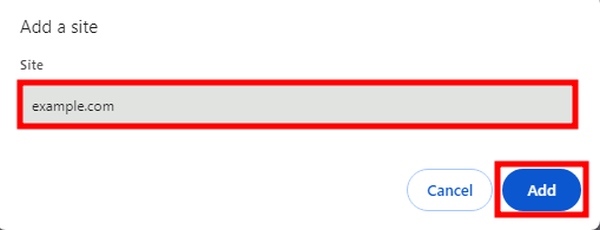
Enter the site’s URL and confirm by clicking ‘Add’.
To allow a specific site, click the ‘Add’ button under the ‘Allowed to send pop-ups and use redirects’ section. This opens a dialog box.
In the dialog box that appears, type the URL of the website from which you want to allow pop-ups. After entering the URL, click ‘Add’. This saves the website to your list of sites that are allowed to show pop-ups and use redirects.

As you adjust your settings in Chrome, there’s no need to look for a save button. Chrome saves your changes automatically as soon as you make them.
We hope that you now have a better understanding of how to manage pop-up settings in Chrome. If you enjoyed this article, you might also like our article on how to manage PDF settings in Chrome or our article on how to manage Chrome display settings.